Archives

Grilled Peanut Butter Sandwich with Caramelized Bananas

I was watching the Food Network…or maybe it was the Travel Channel? Oh well, I don’t even know what show it was but someone made a deep fried PB&J with bacon and bananas. It was over the top and looked quite divine! I was in the mood later in the day for something sweet and salty so I came up with a Grilled Peanut Butter Sandwich with Caramelized Bananas. All I can say is…WOW! Sweet caramelized bananas on top of a warm puddle of peanut butter and smashed between grilled cinnamon-buttered bread slices. Yep, I went there and it was fantastic!

Printable Recipe: Grilled Peanut Butter Sandwich

with Caramelized Bananas

Ingredients:

  • 1 Banana, peeled and sliced

  • 2 full teaspoons of brown sugar

  • 1/4 cup butter/margarine, melted

  • 1.5 teaspoons sugar

  • 1/2 teaspoon cinnamon

  • 2 slices of bread

  • Peanut butter

Directions:

In a small skillet, add bananas. Sprinkle brown sugar on top.

Over medium heat, sauté bananas until warmed throughout and caramelized.

Set aside.

In the melted butter, add sugar and cinnamon.

Using a pastry brush, apply the cinnamon/sugar butter to one side of a slice of bread.

Place the bread slice buttered-side down in a medium-sized skillet. Spread a thick layer of peanut butter on top of the bread slice that was just placed in the skillet.

Using a pastry brush, brush the second slice of bread. Place the bread slice buttered-side down in the same skillet (next to the other slice, not on top of it). There will be left over cinnamon butter. Place it in the fridge to use in the near future; like on toast or biscuits. Grill bread slices over medium heat until light brown.

Using a spatula, carefully remove the peanut butter slice of bread on to a plate with the buttered-side down. Pile high the caramelized bananas on top of the melted peanut butter.

Place the other grilled slice of bread on top (buttered-side on top).

Guess the next time I make these I’m going to have to throw on a couple pieces of bacon for added crunch and salty goodness! I’m thinking crunchy peanut butter with peanut pieces would also make this even more awesome!

Breakfast Casserole

GEDSC DIGITAL CAMERA

Big breakfasts are a family tradition on the weekends in the Pack household! It often either consists of:

A. Eggs, Home Fries & Bacon

B. Sausage Gravy & Biscuits

C. Scrambled Eggs & Cowboy Potatoes

D. Pancakes & Bacon

E. French Toast & Bacon

Steve and I cook together taking our time. We aren’t usually in a rush in the mornings. Well, we aren’t usually in a rush about most things, lol. But when we know we have things to do and don’t have time to cook for an hour followed by an hour of clean up (it takes that long for our teenage son to do dishes, don’t ask…), we make our breakfast casserole instead. It is made the night before and in the morning, it is tossed in the oven and we can get ourselves ready for whatever our busy day entails. This is a buttery and cheesy dish that is easy to make!

Printable Recipe: Breakfast Casserole

GEDSC DIGITAL CAMERA

Ingredients:

  • Loaf of white bread, whole grain or wheat

  • One stick of butter/margarine

  • Small onion, diced

  • 1/2 Green pepper, diced

  • Ham steak, diced or package of diced ham

  • 2 cups of colby-jack shredded cheese

  • Dozen eggs

  • Milk

  • Salt & pepper to taste

Directions:

Spray a 9×13 pan with non-stick cooking spray.

GEDSC DIGITAL CAMERA

In a large bowl, tear bread into small pieces.

GEDSC DIGITAL CAMERA

Melt butter/margarine in a microwave safe dish. Pour 1/2 of the melted butter/margarine over the torn bread pieces. Yep, this was Stevie’s bowl when he was a toddler. I’ve kept it for over 15 years now. With a spatula, gently toss bread with the butter/margarine. Pour remainder of the butter/margarine over the torn bread and again gently toss bread with a spatula to ensure all bread pieces are lightly coated in butter/margarine.

GEDSC DIGITAL CAMERA

Add 1/2 of the torn, buttered bread to the bottom of the prepared pan.

GEDSC DIGITAL CAMERA

Sprinkle 1/2 of the diced pepper, 1/2 of the diced onion and 1/2 the diced ham evenly over the torn, buttered bread. It was way cheaper to buy a fully cooked ham steak than to buy already diced fully cooked ham. I don’t mind dicing up a flat and even slice of ham and I love saving money. The ham steak was a very large piece. So I only used half of the ham up for  the entire casserole. Half of our family isn’t too fond of vegetables so as you can see in the picture above, I only put the vegetables on one half of the pan. If your family isn’t as picky as mine, sprinkle the green peppers, onions and ham evenly over the entire pan. Since I only put diced green peppers on 1/2 of the casserole, I had diced green peppers left over as well.

GEDSC DIGITAL CAMERA

I often will dice up onions and green peppers as soon as I bring them home from the store and freeze them in snack-size Ziploc bags. That way they are always ready to throw in to whatever I am making. I will throw it in frozen and it melts away the ice while cooking and the flavor remains. As you can see in the picture of all the ingredients, I already had diced up, frozen onions to use in this dish. So I bagged up my diced green peppers that I can use in many of my recipes like our No Fail Chili or Cowboy Potatoes and Cheesy Scrambled Eggs. The diced ham I can use later in our Chunky, Cheesy, Potato and Ham Soup or our Beans. Just be sure to date your Ziplocs! Nothing worse then finding a chunk of something when cleaning out your freezer and not knowing if its still good or should be thrown out.

GEDSC DIGITAL CAMERA

Sprinkle 1/2 the bag (1 cup) of Colby-Jack shredded cheese over the vegetables and ham. Add the remainder of the torn, buttered bread on top. Sprinkle the remainder of the diced pepper, diced onion and diced ham over the top layer of the torn, buttered bread. Sprinkle the remainder of the Colby-Jack shredded cheese over the vegetables and ham.

GEDSC DIGITAL CAMERA

In a medium-sized bowl, crack all 12 eggs. Add 1/2 – 3/4 cup of milk. Add salt & pepper to taste. Wisk the eggs, milk and seasoning together making sure all yolks are busted. If you have a favorite scrambled egg recipe, prepare your eggs that same way. We add garlic powder in our eggs and always use fresh ground black pepper for seasoning. I love fresh ground black pepper, it makes everything taste better!

GEDSC DIGITAL CAMERA

Pour the egg mix evenly over the breakfast casserole.

GEDSC DIGITAL CAMERA

Place foil over the 9×13 pan and place in fridge overnight. The torn bread pieces will soak up all that wonderful egg mix while in the fridge. Preheat oven to 350 degrees the next morning. Leaving foil on, bake the Breakfast Casserole for 50 minutes. Remove foil and bake another 10 minutes.

GEDSC DIGITAL CAMERA GEDSC DIGITAL CAMERA

Remove from oven and let set for approximately 5 minutes before cutting into slices.

GEDSC DIGITAL CAMERA

This is a hearty breakfast and I am full with one piece! Since I did the prep work the night before and washed the dishes as I went, all that was left after breakfast was putting the leftover casserole in the fridge. Out the door we were with full stomachs ready to tackle our busy day! This past weekend was fantastic! Lots of sunshine, a slight breeze and warm temperatures! I hope your weekend was as fun as ours!

Humongous Breakfast Burritos

I know it seems like all I do is cook and bake all day, lol. But really I typically only do it once a day for one meal. That’s about all I can stand to do so I make the most anytime I am in the kitchen. Our tiny tornado, Spencer, wanted eggs, “tatos” and bacon yesterday morning. I looked at him like he was freaking crazy because eggs, potatoes and bacon constitutes a “Big Breakfast”! We don’t do that in our house except on Sunday mornings (which usually ends up being in the afternoon after us party animals sleep in all day, lol). I’ve always been a 3rd shifter nurse most of my career so my body likes being up late, the hubby and kiddos not so much but they do tend to stay up later on the weekends with me. So after a couple minutes of looking sideways at our 3-year-old’s request for a big breakfast, I thought, “why not?!” So I cooked the big breakfast! Making enough potatoes for 6 grown men, scrambled eggs ( with 8 eggs) and a pound of bacon just for our baby Spencer and me. Yep, I cook in one mood: Army Size. What to do with our obviously huge amount of leftover food?

Well, how about making burritos as big as Spencer’s head?! So after Spencer and I ate our fair share of the Big Breakfast, I whipped up some Humongous Breakfast Burritos! The very next morning, I had a craving for a big breakfast again and it is only Thursday! No worries, I heated up one of the Humongous Breakfast Burritos and let me tell you…hunger satisfied!

Printable Recipe: Humongous Breakfast Burrito

Ingredients:

  • 6 soft tortilla shells (10-12 inch size)

  • half of a small onion, diced

  • 4 large potatoes

  • 1 pound bacon

  • 8 eggs

  • 2 tablespoons milk

  • 1 cup shredded Monterey Jack cheese

  • Your choice of seasonings (I used seasoned salt, garlic powder, salt & pepper)

Directions:

Peel potatoes, rinse off. Chop potatoes into thin, long chunks (see photo below). In a large skillet over medium heat, heat up butter-flavored oil or vegetable oil (approximately 2 tablespoons).

Add diced onions to skillet and sauté onions for 1-2 minutes. So does my onions look frozen? They are, lol! Those who follow my blog know that I dice up onions and green peppers as soon as they come home from the grocery store. I freeze the veggies in usually 1/2 cup portions in snack-size ziplocs. A couple smacks on the counter with the ziploc bag and the veggies break up nicely. Toss the veggie pieces into your recipe and they melt down adding the same flavor of onions and green peppers if you had diced them fresh for the recipe. Major time saver!

Add potato chunks to the heated skillet. Season potatoes with your choice of seasonings. I use seasoned salt, garlic powder and pepper. Stir seasonings into the potatoes. Cover potatoes and cook for approximately 20 minutes, stirring every 3-5 minutes. Potatoes are done when your spatula can split a large potato piece in half with little effort.

Once potatoes are cooked through, remove lid and cook for an additional one to two minutes to brown up the potatoes adding a little crunch to them.

Remove potatoes from skillet and place in a bowl to cool down.

Add bacon slices and cook till crisp. Remove cooked bacon and place on a plate covered in a double layer of paper towels to help drain some of the grease.

While bacon is cooking, add eggs and milk to a medium-sized bowl. Whisk together ensuring all yolks are busted. Add salt and pepper to taste. Whisk again. Set aside until bacon is done. Pour off excess bacon grease. Do not wash or wipe out skillet. Scrambled eggs are super yummy when cooked in a small amount of bacon grease with little bits and pieces of bacon scrapings.

Whisk together egg mix again and pour into skillet. Scramble eggs till fully cooked, light and fluffy. Remove from skillet onto a large plate to cool.

Take two papertowels (do not separate) and soak under water. Gently wring out. Insert 6 tortillas between the layers of papertowels. Heat sandwiched tortilla shells for approximately 30 seconds in the microwave. Tortillas will be more pliable when warmed.

Place a tortilla on a clean surface. I could have sworn I took pictures of putting the burritos together but I guess in my excitement I didn’t, lol. It’s pretty self-explanatory and I’m guessing visuals aren’t necessarily needed 🙂 Add a heaping spoonful of scrambled eggs. Sprinkle a heavy portion of shredded Monterey Jack cheese on top. Scoop potatoes on top of cheese. Using 2-3 bacon slices, break and crumble bacon over potatoes. Fold in sides of burritos enough to ensure secure ends for the burrito. Wrapping and rolling away from you, wrap your burrito tightly. Wrap the Humongous Breakfast Burrito in plastic wrap. Wrap the burrito again in a 2nd piece of plastic wrap. Repeat with remainder of tortilla shells using up all burrito ingredients. Place double-wrapped burritos into a gallon-size ziploc (be sure to write on the ziploc the date and what is inside with a permanent maker). Place ziploc in the freezer. Burritos now have a triple layer to prevent freezer burn.

To reheat burritos: place double-wrapped burrito in the microwave and defrost using the “meat” setting for “one pound”. Repeat as necessary until burrito is warmed throughout (stopping the microwave every 30 seconds after the first round of defrost to check if the burrito is warmed enough) . Burritos can be unwrapped (be careful, contents will be hot) and eaten with a soft, steamed tortilla shell.

I personally like to fry the burrito for 1-2 minutes in 1.5 teaspoons butter-flavored oil or vegetable oil on each side till golden brown.

Crunchy burrito stuffed with home-made fixings and no preservative, chemical crap – LOVE IT!

Monkey Bread Cupcakes

I was pregnant with our oldest son (now 16-years-old) the first time the hubby made me Monkey Bread. I was hooked! It super satisfied my sweet cravings that I seemed to have a lot of when I was pregnant, lol. It is made with refrigerated dough (you know, the ones in the can) and other basic ingredients. The hubby would put his Monkey Bread together in a bundt pan and bake it up. Then he would drizzle his brown sugar & butter glaze over the top and edges. It is to die for! The only complaint I had was that it was a “one and done” recipe. Meaning, you make it and then have to eat all of it at once. If there are leftovers, the glaze kind of hardens and the bread gets tough, it just isn’t great as a leftover dish. Trust and believe, most days when I was pregnant, the “one and done” concept worked fine because there rarely were ever any leftovers! But nowadays the hubby is working and also back in college, the oldest is busy with high school and all of its extra-curricular activities so it’s just Spencer and me a lot of times. Try as we may, we can’t really eat an entire ring of Monkey Bread by ourselves, lol! So it became my mission to figure out how to portion it and reserve the glaze. So Monkey Bread Cupcakes were born! Super delicious and specifically made to be re-heated in individual portions, we love it!

Printable Recipe: Monkey Bread Cupcakes

Monkey Bread Ingredients:

  • 3 cans of refrigerator biscuits (from the 4 pack of biscuits)

  • 1 cup sugar

  • 1.5 teaspoons cinnamon

Glaze Ingredients:

  • 1/2 stick butter/margarine

  • 3/4 cup brown sugar

  • 1 tablespoon milk

Directions:

Preheat oven to 400 degrees.

Line cupcake pans with cupcake liners (makes 48 cupcakes).

Mix together sugar and cinnamon in a wide (but short) bowl.

Using a pizza cutter, cut each biscuit into 4 pieces. Streamline this by lining up biscuits in rows and cutting down the middle of each biscuit. Then turn the cutting board sideways and cut perpendicularly down the rows of biscuits.

Toss a handful at a time into the cinnamon/sugar mix. Gently shake the bowl to coat each biscuit piece. Repeat until all the dough is used (you will have 2 dough pieces left over, just toss them in a couple of the cupcake liners). This is the part where I tell you to toss the remainder of the cinnamon/sugar mix in the trash. I personally put it in a shaker container to use on toast in the future. As I see it, no dough pieces are in the sugar and I am not one to waste. It would be different if it was raw meat or something “wet” that was dipped in the cinnamon/sugar mix. It is raw dough so you choose what is right for you.

Drop 5 coated biscuit pieces into each cupcake liner. Bake for 9 minutes.

While baking the Monkey Bread, prepare the glaze.

In a small saucepan, melt the butter over medium heat.

Add the brown sugar. Continuously stir until brown sugar is melted down. Add milk and stir till well combined.

Spoon glaze over the Monkey Bread Cupcakes you plan on eating right now. Place the remainder of the glaze in a container with a lid. Place the glaze in the fridge. Store uneaten Monkey Bread Cupcakes in an airtight container on the counter. To reheat, remove cupcake liner from the Monkey Bread.

Spoon one teaspoon of cold glaze from fridge on top.

Heat in microwave for approximately 30 seconds.

Glaze will melt and drip down the sides of your warm Monkey Bread Cupcake.

Perfect when eaten right from the oven or re-heated in the microwave. All packaged in individual portions! Perfecto! Of course, you can just add all the coated dough chunks to a bundt pan coated in non-stick cooking spray. Bake for 17-23 minutes till golden on top and cooked throughout. Once baked, turn the Monkey Bread out onto a plate and drizzle the glaze over the top, down the sides and inside the hole in the middle. Either way, it is fantastic!

Enjoy!

Cinnamon Rolls From Scratch

On Mondays, I try to surprise the hubby and our oldest son with something homemade that they can eat on their way out the door to start their work or school week. So yesterday, I surprised them with some homemade cinnamon rolls. I’ve reviewed a gazillion cinnamon roll recipes over the years and put together our own special recipe taking bits and pieces from various recipes. Cinnamon Rolls aren’t difficult to make but you do need time to let the dough rise twice. You can help along the process with a trick I have learned about yeast dough (see the NOTE at the bottom of this post). Who doesn’t love ooey, gooey, buttery and sweet cinnamon rolls?! Whoever you are, we are not and never will be friends, lol! Make this for your Valentine! Shape your rolls into a heart!

Printable Recipe: Cinnamon Rolls From Scratch

Ingredients:

Dough: 

  • 1.5 teaspoons active dry yeast 

  • 1/2 cup warm water 

  • 1/4 cup sugar 

  • 1/2 cup hot milk 

  • 1/3 cup butter/margarine 

  • 1 tsp. salt 

  • 1 egg 

  • 4 cups flour

Filling:  

  • 1/2 cup melted butter/margarine

  • 1/2 cup sugar 

  • 1/2 cup brown sugar

  • 2 tablespoons ground cinnamon 

  • Raisins and/or pecans (optional)

Glaze: 

  • 4 tablespoons butter/margarine, melted 

  • 2 cups powdered sugar 

  • 1 teaspoon vanilla 

  • 3-6 tablespoons of hot water

Directions:

In a small bowl, dissolve yeast in warm water and set aside.

How warm? It should feel like warm water you would use to take a nice bubble bath in. Test the water temp on your inner wrist. If it is a temperature you think would be comfortable to take a relaxing bath in then the water temperature will be perfect to activate the yeast. You know it is activated because it will create these tiny bubbles and get all frothy on top. Heavily grease a large bowl, set aside.

In a glass measuring cup (that can be put in a microwave), measure out 1/2 cup of milk. Then add the butter/margarine to the glass measuring cup. If using a stick of butter/margarine, 1/3 cup = 5 1/3 tabs. Place the measuring cup in the microwave and heat until milk is hot and butter is melted (between 45-60 seconds).

In another large bowl (not the greased one) add the milk/butter mix, sugar, salt and egg.  Whisk till well combined. Add two cups of flour and mix until smooth. Add yeast mixture and mix till well incorporated. Mix in remaining 2 cups of flour one cup at a time until dough is easy to handle.

Knead dough on lightly floured surface for 5-7 minutes. Kneading dough is fun, think about what or who has annoyed you recently and ground that negativity right into the dough with your fists while taking in deep breaths and whispering “woosah”. You will feel so much better and your dough will love you for it.

Place dough ball into the greased bowl and let rise until doubled, usually one to one-and-a-half hours.

When doubled, punch down the dough.

Turn dough out onto a floured surface. Using a rolling pin, roll out dough into approximately a 15×9 inch rectangle.

Pour melted butter/margarine in the center of the rolled out dough, reserve 2-3 tablespoons of the melted butter/margarine (set aside). Using a pastry brush, brush the butter puddle all over the dough to the edges.

Mix sugar, brown sugar and cinnamon in a bowl. Sprinkle the sugar/cinnamon mix evenly over the buttered dough, reserve 2-3 tablespoons of the sugar/cinnamon mix, set aside.

Evenly sprinkle pecans or raisins over the dough if desired.

On the long side of the dough, roll the dough up. Some of the buttery sugar mix may seep out (I just used the pastry brush to brush that excess on top of the cinnamon roll once it was laid in the prepared pan).

Using a sharp knife, piece of string or unwaxed dental floss, cut roll into approximately one inch slices. I cut up 12 slices that were about 1.5 inches in width. This allowed me to put 3 rows of rolls (with 4 across) in the pan. If using string or floss, cut a piece of string/floss approximately one foot in length. Slide the center of the string under the roll of dough, pull string/floss ends up, cross over your hands and pull strings out sideways (you are essentially pinching off the dough). The string/floss method will keep the cinnamon roll in a more circular shape. I just used a sharp knife, my family loves it anyway I can cut it! Coat bottom of baking pan with the remainder of the melted butter/margarine and sprinkle the remainder of the sugar/cinnamon mix on top of the melted butter.

Place cinnamon roll slices close together in the pan. If wanting to create a heart shape, roll one long edge toward the middle and stop. On the opposite long edge, roll toward the middle and stop (both rolls should be bumped up next to each other). Slice.

When placing the heart in the pan, pinch the bottom point of the heart. Lay hearts in the pan so that the bottom point of one heart faces the indented middle section of the top of another heart. See photo. When dough rises for second time, the hearts may become out of shape. Use a butter knives to pinch the bottom point of the heart prior to placing in the oven.

Let rise again until dough is doubled, about 45 minutes.

Bake at 350 degrees for about 25-30 minutes or until nicely browned.

While cinnamon rolls are baking, whisk together the melted butter/margarine, powdered sugar and vanilla in a medium-sized bowl until smooth and all the powdered sugar clumps have dissolved.

Add hot water one tablespoon at a time until the glaze reaches your desired consistency (I only had to add 1 tablespoon for my glaze). Since butter is the base, this glaze is an amazing, buttery and sweet bliss of a concoction! It is to die for!

Spread glaze evenly over the slightly cooled cinnamon rolls.

NOTE: If you are pressed for time, you can use your microwave to help the dough rise faster during the first rise. Warm microwave by heating up something (like leftovers) for around 5 minutes along with approximately 1/2 cup of water in its own microwave-safe bowl. It is not recommended to heat the microwave without something inside of it (a bowl of water doesn’t count), I hear that is bad for your microwave and well, we like our microwave so I just heated up some leftovers since I had the munchies. Place the bowl of dough in the microwave leaving the bowl of water inside too. Do not turn on the microwave and keep the door shut. The warm and moist environment will help the dough rise usually in 30-40 minutes. I used the same trick for the second rising. No, I didn’t make me more food to eat, lol. This time I heated up Spencer’s mac-n-cheese for him. For the second rise it only took 15 minutes doing this trick. These photos may look like I’ve used a gazillion different bowls, lol. This is because they were taken when I made a batch of normal cinnamon rolls and the next day I also took photos of making the cinnamon rolls in a heart shape. So it’s two days worth of baking and photography!

Enjoy!

Quick Cinnamon Sugar Bread

Before I get into the bread, I have to tell you why I was baking bread at 5 in the morning. It was actually a little therapy for me, lol. I spent the evening (and early morning hours) finishing up a crocheted afghan. It was a fillet pattern of a horse. My intent was to sew it to red fleece (it was black). I seemed to have forgotten that I SUCK at sewing and my sewing machine SUCKS even more.

All those hours I put into making this horse pattern was wasted within minutes. Turns out the combination of crochet and fleece was too demanding on my crappy sewing machine. I actually ended up breaking 4 needles, yes…I said 4. I’ve tried and the hubby has tried to fix the tension for my thread but it never fails (or I guess I should say, “It always fails”). After a few inches of sewing, the tension gets so tight the thread just snaps. My tension is actually set to zero but that didn’t seem to matter. I had to re-thread the needles (because remember I went through 4 of them) at least 200 times.

My zig zag stitch should really be called “zig-skip a few-zag” stitch. I know it’s hard to see the awful stitching in this picture but trust me, it ruined the afghan. And I can’t just rip the seam because I sewn through several layers of yarn. I hate my stupid sewing machine! I wasted all that time pinning the fleece & then pinning the fleece to the afghan. It was a perfect square pattern but after all the horrible sewing, it was more of an abstract pattern, lol. It was ruined and quite frankly, I was annoyed beyond annoyed. This afghan was part of a collection of afghans I had made for the GMHS Football Moms Club to be raffled at home games. We have another home game this Friday so now I have to crochet another afghan and do it fast!

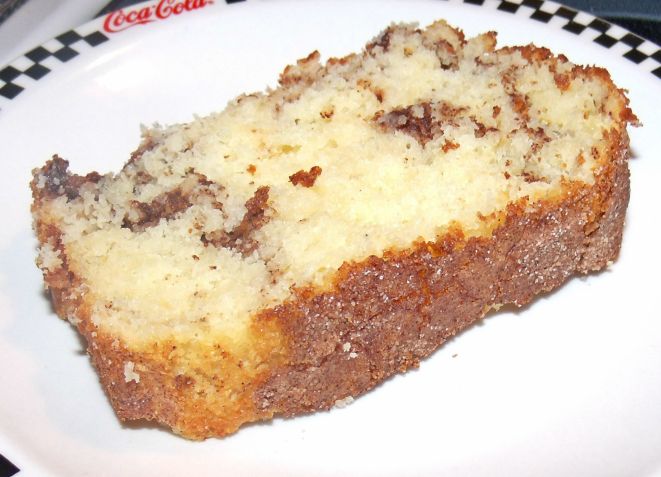
I needed something to go right so I thought I’d give this recipe a try. I altered the recipe just a little. I changed some of the ingredients’ amounts and just tweaked the directions. So glad I tried it because this Quick Cinnamon Sugar Bread recipe was seriously quick and fool-proof. The best part is that the ingredients are ingredients everyone has in their kitchen! No fancy smancy stuff, just simple and real. Just the way I like it. And oh did I need that, I needed something to be perfect after my sewing disaster and this bread certainly was that!

Printable Recipe: Quick Cinnamon Sugar Bread

Ingredients:

  • 2 cups all-purpose flour

  • 1 tablespoon baking powder

  • 1/2 teaspoon salt

  • 1 cup white sugar

  • 1 egg, beaten

  • 1 cup milk

  • 1/3 cup vegetable oil

  • 1 tablespoon cinnamon

  • 3 tablespoons sugar

Directions:

Preheat oven to 350 degrees F. Generously grease a 9×5 inch loaf pan (don’t forget to do all the sides all the way to the top).

In a large bowl combine flour, baking powder, salt and 1 cup sugar.

Using a 2 cup liquid measuring cup, measure out the milk. Add 1/3 cup of oil to the measuring cup. Add the egg to the measuring cup. Whisk milk, oil and egg together until well blended. Pour over flour mixture.

Stir until just moistened.

Pour half of the batter into prepared pan.

Combine the tablespoon of cinnamon and 3 tablespoons of sugar in a small bowl. I have cinnamon and sugar already mixed together in a container that you can see in the ingredients photo. Ok, you probably noticed that it is empty, lol. I need to mix more and fill it back up. We like to have cinnamon and sugar already mixed together for quick cinnamon toast. Because my cinnamon/sugar mix was already pre-made, I’m guessing I used twice the amount listed above. You can’t ever have too much cinnamon/sugar, lol! Sprinkle 1/2 of the cinnamon/sugar mix on top of the batter in the pan.

Cover cinnamon/sugar mix with remaining batter. Top with remaining cinnamon/sugar mix. Bake in preheated oven for 50 minutes, or until a toothpick inserted into center of the loaf comes out clean.

Allow to cool in pan for 10 minutes on a cooling rack before attempting to invert out of the pan. I wasn’t very successful with the bread flipping out of the pan. Only 1/2 wanted to come out so I put it back in the pan and will just keep it in there. The original directions said to grease the pan lightly. I am guessing I greased it too lightly, lol!

Serve warm with a thick slab of butter. Ok, you can omit the butter but I needed the butter this morning and lots of it, lol! Wrap the bread loaf in wax paper and then foil. I guess you could also omit the wax paper but I always think that bread wrapped in foil gets a metal taste to it? It probably is all made up in my head but I don’t chance it, lol! How long will it last on the counter? I have no clue because it will be gone before this day is over!

Update: I guess I should clarify the “Quick” part, lol. It was super easy and fast to put together. For me, it did take every bit of 50 minutes for it to fully bake. But I called it “Quick” because the batter came together and fully in the pan in less than 5 minutes. I had one bowl, one liquid measuring cup, one whisk and measuring spoons to wash. When baking from scratch, this to me is “Quick” 🙂

Update 2: Since I have made this bread seriously 3 times in the past couple of days, I can safely tell you to grease the pan “generously” and it will flip right out. My husband of 17 years demanded this be made everyday when he comes home from work…I just laughed my ass off at him, like I take demands! LOL LOL LOL This is the 1st demand he has ever made of me and unshockingly, his last since it was a huge epic fail on his part, LOL! Good thing he was joking or I would have to kick him in the shins! LOL

Banana Nut Chocolate Chip Crumb Top Muffins

It is very rare that I have a chance to make banana bread or muffins. Our little Spencer is half monkey and eats at least 2 bananas a day. And if we don’t have bananas in the house, watch out, because he can throw the biggest fits you’ll ever witness a toddler do if he doesn’t get what he wants when he wants it! Love my little man, yes I do, but our baby really knows how to make a scene! When he does it in public, I just let him go nuts. He stomps his foot as hard as he can, balls his hands into fists and screams. It is actually funny watching him try to stomp that hard because his legs are so short that he almost tips over trying to get his leg high enough to stomp down, lol. After about 30 seconds and smoke is bellowing from his ears, I shake my head and tell him, “No, no, no. You are doing it all wrong!” I then show him how to stomp several times and to shake his fists and wiggle his hips all at the same time. His face just lights up and he instantly starts laughing because I look sillier than all get out. That’s how I deal with his tantrums and they never last longer than a minute. Folks who happen to witness this exchange often start chuckling. Toddlers are toddlers, they are meant to throw fits. It is just part of the developmental stage they are in. Anyone who ever took Human Growth and Development in college knows this (and all of us “seasoned” mommas who aren’t on their first rodeo knows this too). Erikson knew what he was talking about, Freud, not so much, lol! Those who don’t understand it are the ones who are easily annoyed by a toddler’s antics. And if you are disapproving of anything about my children, get back because I can flip on a dime and turn into a psycho Filipino shouting incoherent sentences! Yep, I have that in me, lol.


So back to why I have extra bananas, Steve Jr. had some of his fellow football teammates over a few days ago and the hubby bought the boys donuts, bananas and orange juice for breakfast. Steve didn’t want them eating too much before we dropped the boys off at football practice. So the extra-bananas were not as ripe as the ones we had on hand. So Spencer got the new bananas and the older ones became over-ripe and came in handy! We finally had some bananas to bake with! I love the fall for so many reasons, one of them being the smells from our kitchen. Baked apple pies or bean soup smells so good when baking or cooking! I have to tell you though, our Banana Nut Chocolate Chip Crumb Top Muffins made the whole house smell amazing when it was baking! You would think Martha herself was hanging out in my kitchen! Say that three times fast: Banana Nut Chocolate Chip Crumb Top Muffins, Banana Nut Chocolate Chip Crumb Top Muffins, Banana Nut Chocolate Chip Crumb Top Muffins! LOL That is a mouthful! And so are our muffins! I adapted this recipe to come up with this dynamite breakfast treat . . . who am I kidding? This isn’t just for breakfast! I’ll be snacking on these puppies all day long! They are super moist and super delicious!


Ingredients for Muffin Batter:

  • 1 1/2 cups flour

  • 1 teaspoon baking soda

  • 1 teaspoon baking powder

  • 1/2 teaspoon salt

  • 4 over-ripe bananas, mashed

  • 3/4 cup white sugar

  • 1 egg

  • 1/3 cup melted butter (or margarine, that is what I use)

  • 1/2 cup chopped walnuts

  • 1/2 bag of milk chocolate chips

Ingredients for Crumb Topping:

  • 1/3 cup packed brown sugar

  • 2 tablespoons flour

  • 1 tablespoon white sugar

  • 1/8 teaspoon of ground cinnamon

  • 1 tablespoon cold butter (or margarine)

 Directions:

Preheat oven to 375 degrees. Lightly grease 15 muffin cups (or use cupcake papers). I don’t care to get shortening under my fingernails so I use an old trick. I stick my hand into a sandwich bag and grease my tins this way. No fuss, no muss and just toss the sandwich bag away! Note: the muffins will raise above the tin so don’t forget to grease the top of your muffin tins!

In a large bowl, whisk together 1 1/2 cups flour, baking soda, baking powder and salt.

Set aside.

In another bowl and using an electric mixer, mix up bananas, 3/4 cup sugar, egg and melted butter at medium speed till smooth. Fold in the chopped walnuts and milk chocolate chips.

Stir the wet mix by hand into the dry mix just until the dry mix is moistened. You don’t want to over stir this. Why? Hecks if I know, lol. I just know that every banana something recipe I’ve ever read over the years said to do it this way so who am I to go against a gazillion bakers? lol Spoon batter into the prepared muffin tins till about 1/4 inch from top.

In a small but deep bowl, mix together brown sugar, 2 tablespoons flour, 1 tablespoon white sugar, cinnamon and 1 tablespoon of cold butter. It’s easiest to do this using a fork. After mixing vigorously with a fork for a couple of minutes, the butter should be in tiny pieces and the mix crumbly.


Spoon the crumb topping on top of the muffins (approximately 1 tablespoon for each muffin).

Bake for 17-19 minutes. Remove from oven and allow muffins to cool completely in the muffin tins.

If cupcake liners were not used (like in these photos), use a butter knife to gently loosen the sides and to lift the muffin out of the tin. Store in a tightly covered container. For how long? I wouldn’t know, they were gone by the afternoon! Get ready for a flavor explosion as you take a bite of these incredibly moist muffins!


Home-made Sugar Donuts

Who doesn’t love fresh donuts? There’s no denying the best is the Krispy Kreme donut shop up on the northwest corner of the city. When the neon light is on, it means they just glazed a fresh batch. They literally melt in your mouth! Then there’s the Jolly Pirates over on the far eastside of the city. They are one of the few donut places that still bake from scratch (not from some frozen concoction). It is open 24 hours a day and honestly, the best time to get donuts there is around 3AM. They are all incredibly fresh! But sometimes it’s nice to make donuts at home! They are super easy to make and require only 3 ingredients. Our Home-made Sugar Donuts satisfy our sweet needs late in the night when we already have our pj’s on and don’t want to go anywhere!

Ingredients:

  • 1 can of Pillsbury Country Style Biscuits (10 count)

  • Vegetable Oil

  • Sugar

Directions:

Those 4 pack of Pillsbury Country Style Biscuits are a staple in our fridge. It is what we bake when we make our Sausage Gravy. They are also perfect for donuts! First pop the can open. For whatever reason, this was really hard to do tonight. I banged the heck out of it on the edge of the counter before the cardboard finally busted open. Whew! That was a workout, lol! Next, find something to use to make the donut hole. I just grabbed the plastic cap from a disposable bottle of water. You just need something about the diameter of a dime. Punch out the donut holes in the 10 biscuits. Don’t toss the donut holes! They are perfect little bites for little ones like Spencer!

In a frying pan, add a thin layer of vegetable oil (about 1/4 inch). Heat oil up over medium heat. It is important the oil be hot! If it’s not, then you get an oil soaked donut and they aren’t too tasty. I check how hot my oil is by sticking my finger in it . . . NOT! LOL I run my fingertips under water and flick a little water into the oil (I mean very little). If the water pops, the oil is hot. While waiting for your oil to heat up, pour some sugar (1/2 cup) into a shallow, wide bowl. Drop your donuts and donut holes into the frying pan.

If the oil is heated up enough, it will bubble immediately around the dough. They will balloon up and only take approximately 2 minutes on each side to cook up.

Check your donut by using the handle of a wooden spoon (or in my case my plastic spoon that looks like a wooden spoon) and stick it through the donut hole to see if it golden on the bottom. If it is, flip it over and cook until the other side is golden.

Place the cooked donuts on paper towels to drain the excess oil. Once cooled enough to touch, place the donut in the sugar and give your bowl a little shake to coat the donut. Flip the donut over and coat the other side with sugar. Don’t forget to sugar up the donut holes! Alternatively, you could add cinnamon to your sugar or just use powdered sugar.

Any way you add sweetness is good because these fried donuts are an easy and perfect treat!

Cowboy Potatoes and Cheesy Scrambled Eggs

We love the weekends! We are all busy, busy, busy and it’s so nice to sleep in a couple extra hours on the weekend and start the day a little slower. Breakfast is huge on the weekend in our home. It’s a time for Steve and I to cook together without feeling the pressure to get the dinner quickly on the table. With everyone’s schedule, dinner time sometimes doesn’t happen till 8pm on some days!  We have though as a family always valued “table time” whether it is actually at the table or on TV trays in our living room. There’s an old saying, “A family that eats together stays together.”

We believe in that wholeheartedly 🙂

We woke up this past Saturday and realized we didn’t pick up bacon earlier in the week, bummer! We opened the freezer and saw our favorite back-up breakfast meat: Polska Kielbasa. Perfect! We knew then we would have our Cowboy Potatoes and Cheesy Scrambled Eggs for breakfast. Yummy!!!! Steve’s parents, both caterers, has taught us many different tricks and recipes. The Cowboy Potatoes recipe comes from them. It is one of my favorite ways to cook potatoes! So I will break up this post into two recipes sections. I am guessing most folks know how to cook scrambled eggs but our Cheesy Scrambled Eggs recipe may come in handy for someone new to cooking. We all started somewhere, so I will start with our Cheesy Scrambled Eggs.

************************** RECIPE I ****************************

There are some “tricks” to making fluffy pieces of scrambled eggs. First off, thoroughly whisk up your egg mix! Make sure the yolks and whites are thoroughly combined and no longer appear separated. There are some folks who mix their eggs with a mixer or in a blender…not my thing. I want the eggs well-combined but I don’t want it to look or taste like the egg mix in a carton that is served at most fast-food chains. Cook your egg mix, slow and low, meaning at a low temperature (nothing higher than medium heat) and don’t rush the cooking process. Use a wide spatula to gently push your eggs into what will become fluffy pieces. Don’t turn or mix your eggs a bunch of times or you will end up with tiny crumbled hard pieces of rubber eggs. It only take 5 or 6 times turning the eggs to cook them right. You need to also make sure that you add just a little bit of oil or butter (or in our case, our GFS brand of butter-flavored oil) to your pan and if possible, cook the eggs in the same pan you cooked your breakfast meat. A little bit of meat drippings really enhances the flavor of your eggs. Now if you cooked a pound of bacon, drain off the majority of the bacon grease. You only need just a little bit of the meat drippings, like a teaspoon or two. Lastly, add the cheese at the right time…the cheese doesn’t need to be “cooked” into the eggs! The cheese only needs to melt over your eggs! I’ve seen a lot of folks through the years add the cheese directly to their egg mix or too early into the frying pan. When cheese begins to melt, it does produce small amounts of liquid that almost looks like your egg mix. So folks think their eggs are still “runny” and end up cooking their scrambled eggs “hard” by cooking it longer than they should. So the cheese really should be added after the eggs are cooked. Lastly, you can reheat cooked eggs in the microwave without them turning into rubber. Drench a paper towel and wring it out. Place the damp paper towel over your plate and reheat your eggs in 30 second increments until it is as warm as you like it. The paper towel helps in steam-heating the eggs!

Ok so here goes the rest of the recipe for our Cheesy Scrambled Eggs

Ingredients:

  • 8 eggs (for our family of four, it is two eggs per person)

  • 1/3 cup milk

  • 1/2 teaspoon of onion powder

  • 1/4 teaspoon of salt

  • 1/2 teaspoon of pepper

  • 1 tablespoon of butter/margarine/butter-flavored oil

  • 1/2 cup of shredded colby-jack cheese (or more to your taste)

Directions:

In a medium size bowl, crack your eggs. Watch out for the little pieces of shell! Make sure none of them make it into your bowl. Add the milk, onion powder, salt and pepper. Make your eggs your own. You could certainly add a dash of hot sauce or garlic powder.

With a whisk, thoroughly combine your egg mix. If possible, use the same pan you used to cook your breakfast meat making sure you have 1-2 teaspoons worth of meat drippings in the pan. Since we used the remainder of the Polska Kielbasa link to cut into large chunks, we did have some meat drippings to use. The wonderful thing about using the drippings from the Polska is that the drippings somewhat caramelized when they were pan-fried, extra yummy goodness! Plus, we have a slice of bacon, err, Polska to go with our breakfast meal! Add the butter, margarine or in our case, butter-flavored oil. Heat up the pan. Right before adding the eggs, be sure to whisk the egg mix one more time in case it settled again. Pour egg mix into pan. After a couple of minutes, take your wide spatula and gently scrape the bottom of the pan.

You should see large chunks of semi-cooked eggs appear. Using your spatula, gently turn the large chunks of eggs over. Repeat this process another 4-5 times. After a few minutes (approximately 5-7 minutes) your eggs will be cooked and this is evident when there isn’t any free-standing liquid in the pan.

Sprinkle the shredded cheese over your eggs. Allow the cheese to melt fully (approximately 1-2 minutes).

Turn your eggs with your spatula one last time and use your spatula to gently cut up large but bite-size pieces of eggs. Remove eggs from the pan onto a serving platter. Tadah! Your fluffy, cheesy scrambled eggs are done!

************************** RECIPE II ****************************

Now let’s talk about the Cowboy Potatoes. They are reminiscent of potatoes you would cook over the open flame of a small bonfire, hence the name, Cowboy Potatoes. I unfortunately couldn’t find my potato scrubber Saturday morning, darn teenage son, who after moving into our current home 10 years ago he still doesn’t know where to put the dishes and silverware back to after he washes them! I don’t really complain though because well, he IS washing them, lol. It’s just always a scavenger hunt when you are looking for something in the kitchen, lol. Heck, our dishwasher went out years ago, it was an Amana even…so now our dishwasher is a “Stevie,” lol. Normally, I would scrub the potatoes and leave the skins on but today had to go with peeling them. They still turned out fantastic but I highly recommend leaving the skins on. What potatoes did I use? Good ol’ Idaho potatoes. I will be honest though, this meal is even better when small red potatoes are used but I’m all about using what I have on hand in my pantry at the moment. Fresh onions and green peppers are a must! When we go grocery shopping, I always pick up one large onion and one large green pepper. These are staples in many recipes we use. I take the time to clean and dice the onion and green pepper and then separate them into snack-size Ziploc baggies in the freezer (approximately 1/4 cup in each baggie). I toss the baggies in the freezer and then they are ready to go whenever I need them for our meatloaf, chili or any other recipe that needs a little extra flavor. It’s so nice to have veggies already diced and ready to go at a moment’s notice so it’s well worth the time to dice them up when you first return home from the grocery store. Seriously, one large onion will give you at the very least 4 baggies full when diced. Same with the green peppers! I don’t ever bother to unthaw the onions or green peppers, I just throw them in frozen into our recipes. All you have to do is smack the baggie on the counter and drop in a chunk or two of the diced veggie depending on how much of the veggies you want to add to a recipe. The best part is that they cook up like they were tossed in fresh not frozen! The onions still caramelize and become transparent and the peppers wilt to just the right amount when cooked while still having a little crunch to them. They melt slowly, separate into their little diced pieces and turn out perfect every time!

Our family prefers Polksa Kielbasa. It is a smoother blend of meat that doesn’t have the unsightly and untasty chunks of white mystery pieces in it found in most other sausage links. Plus, you can always find Polska Kielbasa on sale for around $2.50 for a huge link of it!

So here goes the remainder of the Cowboy Potatoes recipe:

Ingredients:

  • 1 cup of sliced Polksa Kielbasa

  • 5 medium-sized potatoes (general rule when cooking with fresh potatoes, 1 potato for each person and 1 extra potato for the pot)

  • 2 tablespoons of butter/margarine/butter-flavored oil

  • 1 heaping tablespoon of diced onion

  • 1 heaping tablespoon of diced green peppers

  • 1.5 teaspoons of Lowry’s Seasoned Salt

  • 1/2 teaspoon of garlic powder

  • 1 teaspoon of pepper

Directions:

If you haven’t already, slice the Polska Kielbasa into thin medallions (1 cup worth). For us, we took the remainder of the Polksa Kielbasa link, sliced it in 1/2 length-wise and then cut large chunks up to fry on the side (we used the meat drippings from this to cook our scrambled eggs in).

Set sliced Polksa Kielbasa off to the side. Scrub your potatoes well (if using skins, which again, I strongly recommend) or peel your potatoes. Cut your potatoes into long, bite-size chunks (like a thick, Julienne style). Set potatoes aside. In a large frying pan, add the butter, margarine or butter-flavored oil and heat over medium heat.  Once butter, margarine or oil is heated up, add the potatoes, diced onion, diced green peppers and sliced Polksa Kielbasa to the frying pan (see, my onions & green peppers were still frozen).

Give it a good stir to combine the ingredients. Sprinkle the Lowry’s Seasoned salt, garlic powder and pepper over the potato mix. Stir again until well combined. Place a lid over the potatoes; this allows the potato to cook all the way through by means of “steaming”. Continue cooking with the lid on for approximately 10 minutes stirring every couple of minutes or so.

Locate a large piece of potato in the pan and give it the “fork-test”. If the fork slides easily into the potato chunk, then the potatoes are cooked through (if not, place lid back on and cook a couple more minutes until fork slides easily into a potato chunk). Remove the lid and pan fry the potatoes to give then a golden brown color and a little crunch. Tadah- your Cowboy Potatoes are done! We baked up some Grands biscuits to make our breakfast complete!

I wonder if I am spelling “tadah” right? Oh well, you know what I mean, lol! If Emeril can use “Bam” as his catch phrase then I most certainly can have one too…

…so TADAH !

Easy Homemade Sausage Gravy

There’s nothing like waking up on a Sunday morning to homemade sausage gravy and biscuits! I also like it over home fries! Making it is  so easy! Everyone who has tried my Easy Homemade Sausage Gravy says it is the BEST! Of course, they could just say that to be nice but, I love this sausage gravy myself so I have to believe there is some truth in their statements 🙂

Ingredients:

  • 1 lb of mild sausage (Jimmy Dean, Bob Evans or any kind in a 1 lb roll as long as it is mild)

  • 1/3 cup flour

  • 4 beef bouillon cubes

  • 1 cup water

  • 2 cups milk (separated into 1 cup each)

  • 2 heaping tablespoons cornstarch

  • 2 cups water (separated into 1 cup each)

Directions:

In a frying pan, brown and cook sausage. Break down pieces into small chunks. While cooking sausage, boil bouillon cubes in one cup of water in a small saucepan until thoroughly dissolved. Drain cooked sausage. Place cooked sausage crumbles into a large pot over medium heat. Sprinkle flour over sausage and stir. Immediately stir in the one cup of water with dissolved bouillon cubes. In 1 cup of cold milk, stir in cornstarch. Cornstarch will blend better in cold liquid. Once cornstarch dissolved, add the cup of milk into the pot. Add 1 cup of water. Add another cup of milk. Add another cup of water. Stir well. Bring sausage gravy to boiling over medium heat stirring frequently. Slow and low, takes a few minutes but you don’t want to just turn the burner on high because it prevents the gravy from thickening up nicely. Boil for one minute. Turn heat down to simmer for 15 minutes stirring frequently. Serve over warm baked biscuits, home fries or fried eggs. Super easy, super tasty! We prefer the Pillsbury 4 pack of small biscuits. Quick to bake up and easy to tear up! The sausage and bouillons give the gravy all the flavor it needs! You can also freeze any leftover gravy. To reheat, place frozen gravy in a saucepan and warm over medium to low heat. Bring to a boil and eat it again! Servings: approximately 5 cups of gravy (more than enough for our family of 4)!