Archives

Elvis is in the House!

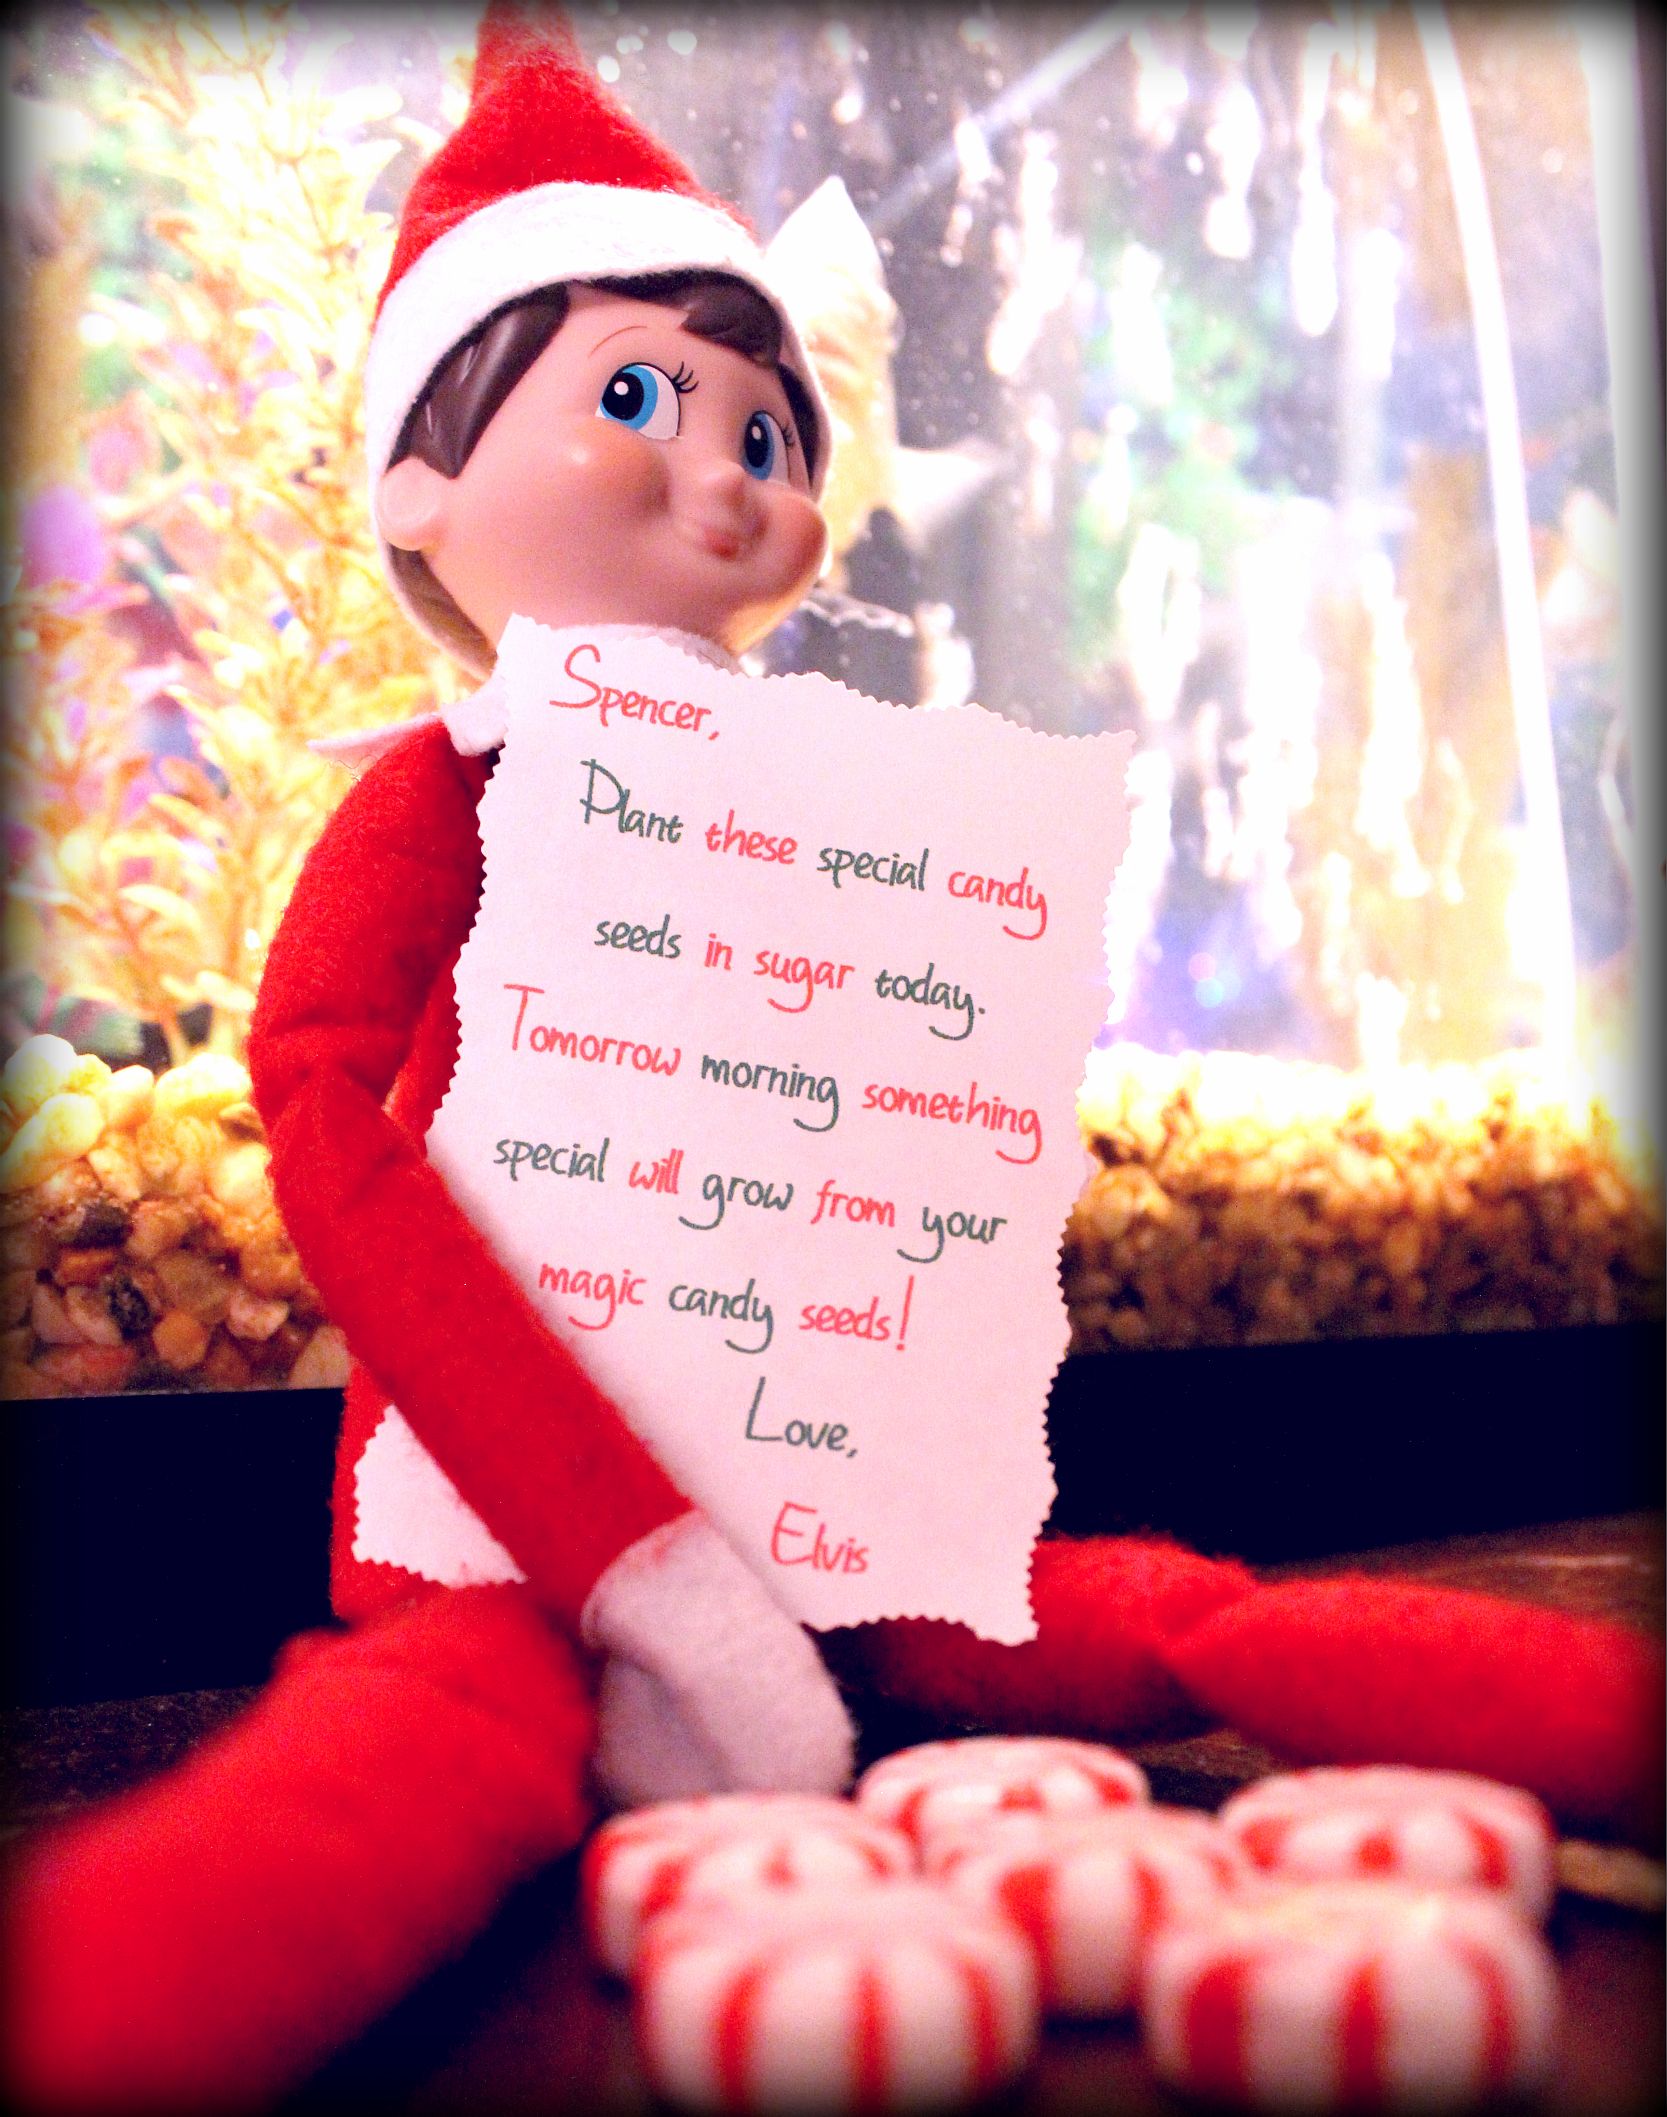
Whew! I haven’t posted lately. It’s been super crazy with our kindergarten kid and our high school senior! But it’s that time of the year again and Elvis is in the House! Elvis is Spencer’s Elf on the Shelf. Just wanted to share Elvis’ shenanigans for the past couple of days. First, Elvis left magic candy seeds for Spencer to plant in sugar.

craftycreativekathy.wordpress.com

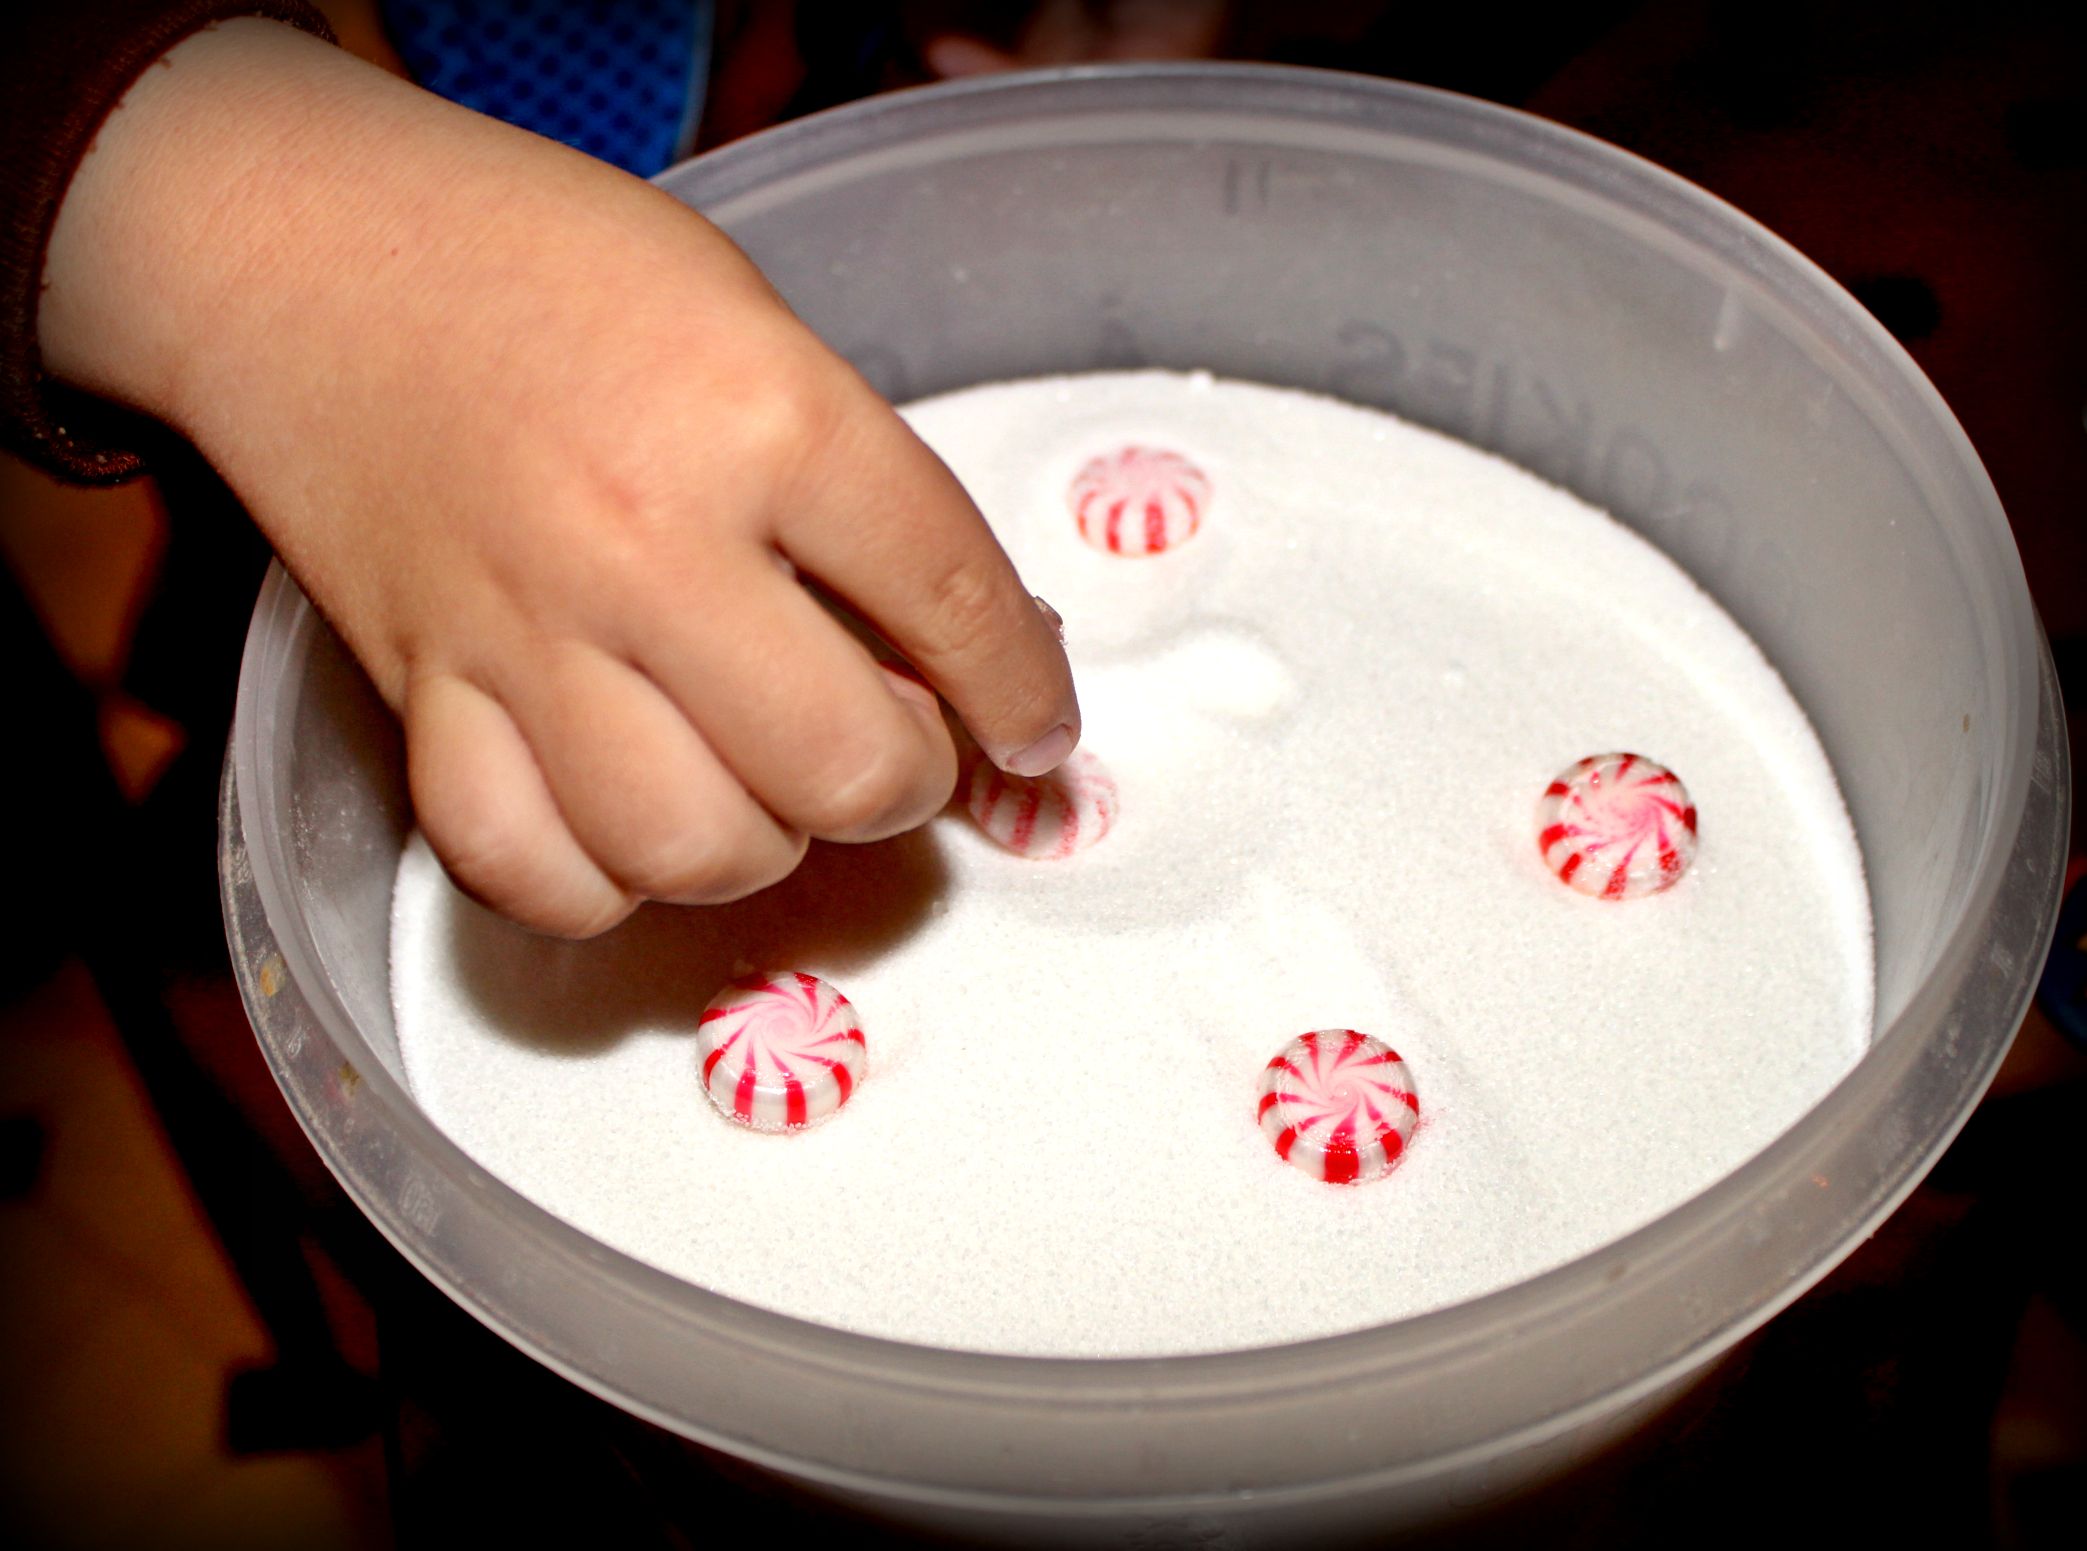
Spencer was so excited to “plant” his magic candy seeds in our sugar container!

craftycreativekathy.wordpress.com

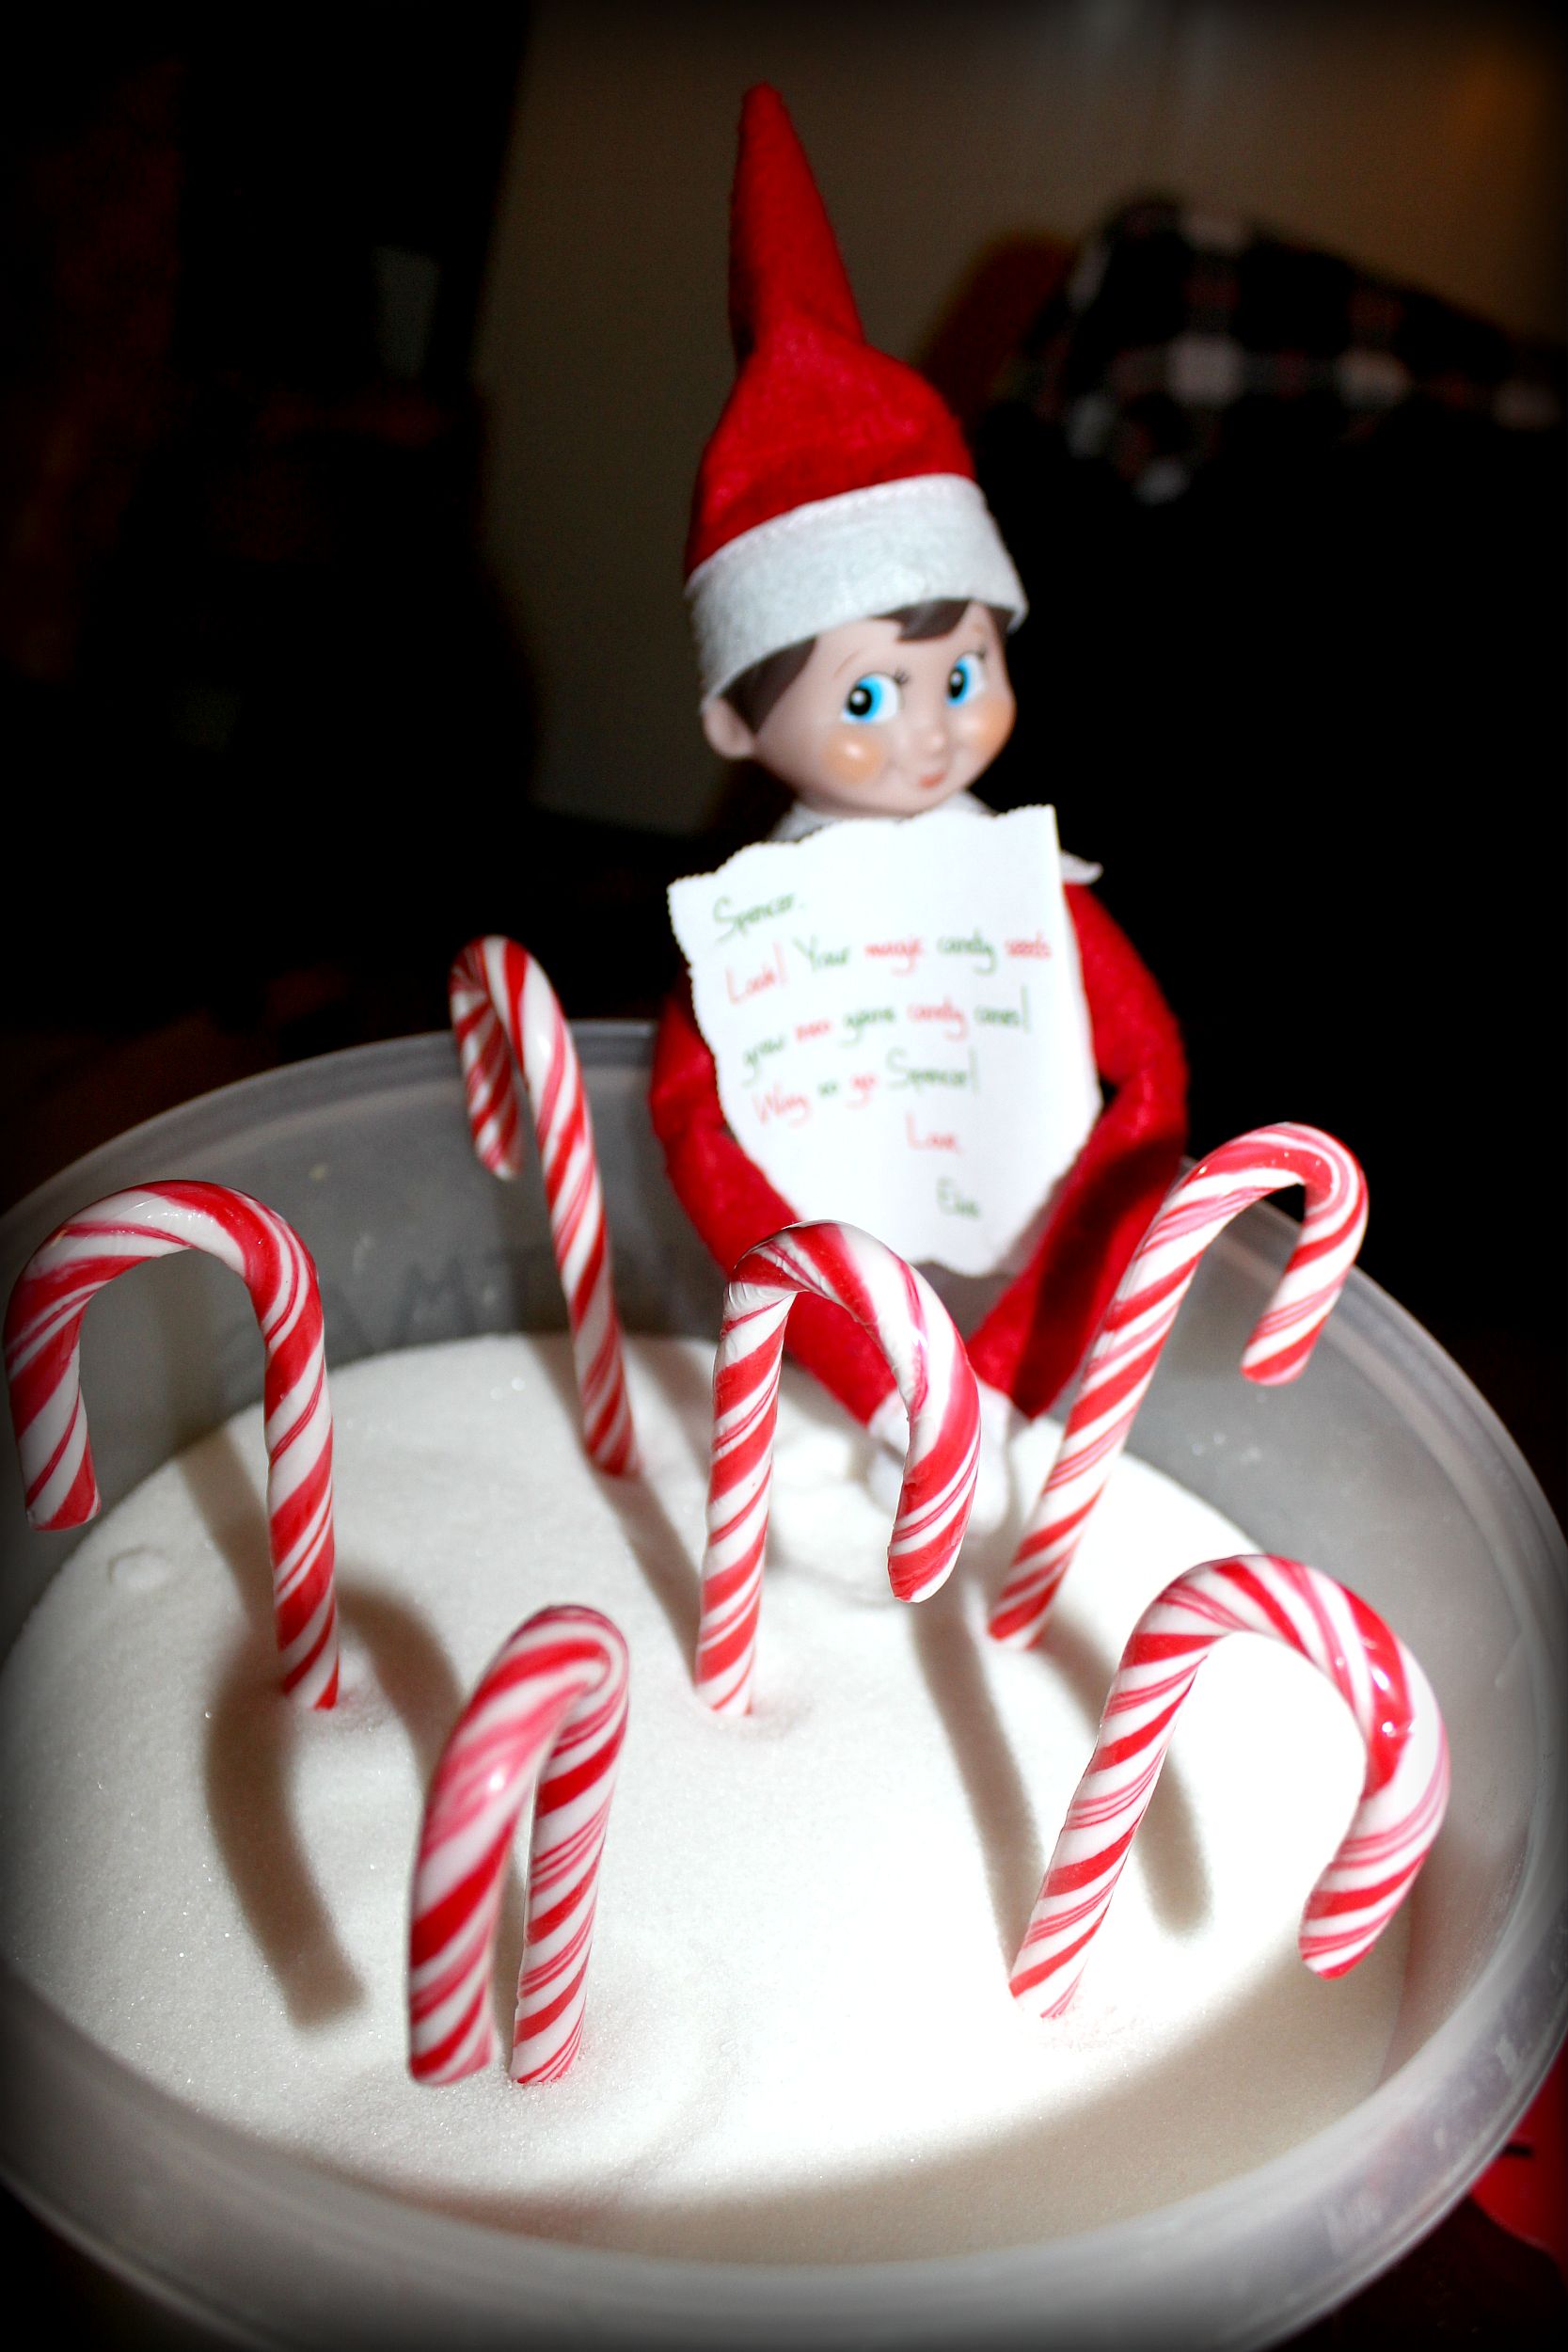
Elvis returned the following morning with a special note!

craftycreativekathy.wordpress.com

Spencer grew giant candy canes from his magic candy seeds!

craftycreativekathy.wordpress.com

Hope your Elf on the Shelf is bringing lots of smiles to your precious babies! Elvis is working wonders in our very blessed home! Happy Holidays!

Robot Snacks

Yes, it was a huge shock to have a 2nd child 12.5 years after your one and only child. Long story short, we waited two years after our first born to try to have another child. Steve and I always figured we would have at least 6 since our last name is “Pack” bwahahahaha!

Seriously, we always thought we would have a large family. Well 3 years of fertility treatments by three different doctors and it was a very sad reality for us that a large family wasn’t meant for us. We were told that I just wasn’t releasing eggs for this reason or another, can’t exactly remember all the blah, blah, blah…I was too heartbroken to hear about the “why”, I was focused on the “why not”. We were told that our best bet was in vitro fertilization but that it was also not a guarantee…and it would cost $10,000 at least. That was back in 1999. We laughed at the dollar amount and then decided that for whatever reason, God wanted us to have just one healthy son. Then a few years later I was diagnosed with PH and well, we just forgot about wanting another child and focused on survival. So although Spencer was a huge, huge, huge surprise, he was wanted so desperately for so many years…and it turns out that several doctors were wrong, lol!

So this time around with our 2nd “only” child…that’s really what it’s like when your kids are 12.5 years apart, lol…I am “experienced” and can’t wait to do all the cool mom stuff again! With him starting preschool this year, I had a flood of memories of all the fun crafts and baking I did with our oldest son, Steve, when he was Spencer’s age. I couldn’t wait to make pudding dirt cups with gummy worms hanging out of it! That was Steve’s favorite and he still talks about that! He told all the girls in his class the dirt was real (although it was just crushed Oreos, lol). Then came the preschool handbook. In big, bold letters, absolutely no home-made food items can be brought to the school for the kids to share. All food items had to be in original packages with the ingredients clearly listed. Also, any baked items had to come in their original containers and also have a full ingredients label attached. This was part of the state regulations that governs the preschool and based on protecting children with allergies. Oh I get it, I am still of course a nurse…anaphylactic shock is no joke but my heart sunk a little with the realization that I wasn’t going to be able to make all those fun treats in my kitchen for all the kiddos. I do get it, I really do get it and Lord knows I don’t want a child hurt from eating something I made!

Spencer’s Halloween party is tomorrow and I signed up for snacks. I may not be able to whip up some fun preschool treats but that doesn’t mean the creativity has to stop! I found this picture above on Pinterest. How cute are these Robot Snacks?! I knew instantly that this is what I would make for Spencer’s preschool class! Alas, it was a bad pin. When you clicked on the link, it just took you to a blown up picture of the same picture. But that’s ok, the wheels were turning and I enjoyed figuring out how to make these Robot Snacks! So this post is all about how to make these awesome Robot Snacks!

Items you will need (the amount needed for each item is dependent on how many Robot Snacks you are making – the amount listed is needed to make one Robot Snack):

  • 2 small snack-size Sun-maid Raisin boxes
  • 1 Minute Maid 100% Juice Box
  • 2 Mini Roll Fruit Roll-ups (available in this size during Halloween season for folks to pass out instead of candy)
  • 1 Apple Sauce (I used Meijer’s brand)
  • 1 Plastic Spoon
  • Scotch Brand Double-sided Tape
  • Regular Transparent Tape

Directions:

First gather your supplies and remove the individual portions needed of each item.

I specifically chose 100% fruit juice for the kiddos. Start by turning the juice box upside down and placing a piece of double sided tape on each end of the box (see photo where the arrows are).

Next, place your two small raisin boxes next to each other but slightly tilted out to create the feet (see above photo).

Push down the juice box (tape side down) on top of the two raisin boxes. I put the juice box more toward the center of the raisin boxes for better stability. I also made the side that did not have the straw attached as the front. I kept the straw attached.

Place a piece of double sided tape on each side of the top of the juice box (see the arrows in the picture above). This is where the arms (the mini Fruit Roll-ups) will go.

Firmly push down the package of Fruit Roll-up so that it hangs down the side of the juice box.

Apply a long piece of tape across the front and back of the juice box (see the arrows in the above photo).

Gently, but firmly, push down the apple sauce upside down on to the top of the juice box. The Meijer brand applesauce had the expiration date imprinted on the apple sauce container, I just made sure the date was facing the back of the robot.

Get out your googly eyes. I bought mine at Dollar Tree for only $1.00! Get your glue sticks (again purchased at the Dollar Tree for $1.00) and your glue gun out. Heat up up a stick of glue inside the glue gun. The googly eyes came in 3 different sizes. One big eye would have been awesome however, I was afraid that if they all didn’t look the same that there may be some arguments between the kiddos. So the same size eyes went on the ones I made for his class.

Add a small drop onto the back of each eye. I allowed the glue blob to sit there for about 30 seconds because one, I didn’t want to burn my fingerprints off and two, I didn’t want the glue to melt through the apple sauce container. Carefully push the eyes on to the front of the applesauce container. I chose Meijer brand because the sides of the apple sauce container were smooth. I originally had Mott’s Applesauce but the container is textured to look like a barrel. I knew I wanted a smooth surface for the eyes so I went with Meijer brand…funny thing is that I paid a few cents more for Meijer because the Mott’s was actually on sale, lol!

I thought they turned out awesome! Yes, it doesn’t take much for these to fall apart. That was my intent. As fun as it is to look at, it’s still food and I want the kids to be able to take it apart and eat it.

So I was comparing my creation with the original Pinterest photo and realized I forgot to add the spoon “antenna”! So I taped the spoon to the back of the juice box. This was a bit tricky because the applesauce did stick out on the backside of the juicebox like it does in the front (the diameter of the applesauce is larger than the diameter of the juice box). I just used a longer piece of regular transparent tape and made sure it wrapped around the sides of the juice box.

Spencer’s Robot Snacks are ready to go, all 16 of them!

Happy Halloween folks!

Keepsake Handprints

As Mother’s Day is fast approaching, I thought I would reblog this post for fantastic Mother’s Day gift ideas for both moms & grandmas! Easy and inexpensive yet PRICELESS! These handprint poems still adorn our wall and I can’t help but smile every time I walk by them. Happy Mother’s Day to all those blessed and fortunate to be a mom!

craftycreativekathy

There just isn’t anything much sweeter than your baby’s hand! They are so small, soft and ready to grab on to everything! I am all about memories. I’ve crafted and created many things over the years but the ones I love most are the ones where my children are part of it. Today I want to share with you my Keepsake Handprints craft that started on Mother’s Day in 2001 and was finished Mother’s Day 2012.

In May of 2001, I found this sweet poem online:

Sometimes you get discouraged

Because I am so small

And always leave my fingerprints

On furniture and walls.

But every day I’m growing –

I’ll be grown some day

And all those tiny hand prints

Will surely fade away.

So here’s a little hand print

Just so you can recall

Exactly how my fingers looked

When I was very small.

Stevie (our now 15…

View original post 664 more words

Keepsake Hand Ornaments

GEDSC DIGITAL CAMERAI have seen several versions of this craft project around the internet. I couldn’t wait to make this with Spencer! It is just a super cute way to create a keepsake of your child’s precious hand print!

GEDSC DIGITAL CAMERAAll you need to create this cutie are some glass balls (I used frosted blue balls I purchased from Hobby Lobby for around $2.50 on sale), white acrylic paint (purchased from Michaels for .69 cents), a foam brush and different colored permanent markers.

GEDSC DIGITAL CAMERAFirst, pour a small amount of paint onto a styrofoam plate. Generously paint your child’s hand with white paint all the way to the finger tips. Spencer just laughed and laughed saying it tickled and was cold.

GEDSC DIGITAL CAMERABefore placing the ornament in his precious hand, I first showed him what to do. I placed an ornament in my palm and slowly wrapped my fingers up and around the ornament. I told him to “hug the ornament with your fingers”. I then showed him how to open his hand back up pulling his fingers off the ornament slowly. Once he understood, I laid the ornament in the palm of his hand and said, “hug it!” Spencer did exactly as he was told and shrieked in delight when he saw his big white hand print! We repeated these steps for the other 5 ornaments. Once done, I secured the ornaments (see below) and helped Spencer wash off all of the paint.

GEDSC DIGITAL CAMERAI strung the balls onto a dowel rod. I taped the hanger piece to the dowel rod so the ornaments wouldn’t slide and move up and down the dowel rod. I then suspended the ornaments between 2 TV trays and allowed them to fully dry for a couple of hours.

GEDSC DIGITAL CAMERAWith Spencer’s help, we used permanent markers to decorate his hand prints turning them into snowmen. First I drew the eyes (black marker), mouth (black marker), buttons (black marker), nose (orang marker) and stick arms (fine point brown marker). Then I let Spencer choose the colors for each hat with matching scarf for each of the 5 snowmen. I gave him the choice of earmuffs, a ball cap, top hat or Santa hat. He picked the color, then picked which type of hat and I drew them all on as he delightfully watched.

GEDSC DIGITAL CAMERADon’t forget to turn the ornament over and write your child’s name and the year it was created. Spencer loved this craft project as much as me! Spencer is mighty proud of his little Keepsake Hand Ornaments! A perfect way to turn  your child’s hand print into a keepsake item that I’m sure his or her grandparents would love to get as a Christmas present!

GEDSC DIGITAL CAMERA

Polar Express Round Trip

GEDSC DIGITAL CAMERAThe holidays are fast approaching! Never fails, we are always pinching money during this time of year to ensure our kiddos don’t go without. BUT, that doesn’t mean we can’t take in all of the holiday activities in our own special Pack Family way! The Scioto Mile was lit yesterday as well as the Columbus Commons downtown. The Columbus Parks and Recreation Department has made great strides in cleaning up the downtown area making it a place where people don’t just work there, they play there! There’s also Zoo Lights going on and a bunch of other activities all around the city. As much as we want to do it all, the cost for all those activities adds up quickly! So Steve and I hatched a plan to create the Polar Express Round Trip for the Pack Family.

283756_455604437791044_973676671_n

It started with help from one of our closest friends, Beth. She beats out Wikipedia when it comes to being a source of information and will give you a run for your money on Jeopardy (I let her win when we watch it together because, you know, it’s important to her…bwahahahahaha). She also pretty much has her own library because not only is she an avid reader, so are her two fantastic kiddos, Jodi & Jake. I asked if she had some kiddie books around that I could borrow that would be age appropriate for our 3-year-old. With a wink and a blink, she rounded up over 30 kiddie books and demanded we not borrow but instead keep them.

GEDSC DIGITAL CAMERA

I did a search online for the Polar Express Ticket. I wanted something that looked authentic. I found the perfect image! I pasted the image into a Word document and enlarged them into fun-size tickets! Looking for Polar Express Tickets? DOWNLOAD THESE! I printed them and cut the tickets out. While I was doing this, Big Steve took the books into our bedroom and locked the door. He wrapped each book up individually in bright red wrapping paper. Ok, as I look more closely at the picture, I am guessing the name in the bottom left corner is “Aidan”? Oopsy, I should have photo-shopped right over that name lol. Oh well, the tickets still looked very real! Actually, I just officially named our minivan “Aidan” so it’s all good! LOL

GEDSC DIGITAL CAMERA

We told the kids we had a surprise for them and to get their PJs on. They returned in their flannels after just a few short minutes. We handed them their tickets and said let’s go! It’s time to get the Pack Polar Express Round Trip on the road! The kids were both excited, yes, the 3 year old and the 16 year old!

GEDSC DIGITAL CAMERA

While Stevie helped his little brother into his car seat, Steve stayed behind just long enough to put all the wrapped books under the tree.

GEDSC DIGITAL CAMERAGEDSC DIGITAL CAMERA

As we turned off our street we were saddened to see a huge house fire just around the corner on Sedalia. Here we are ready to embark on the Polar Express and someone lost their home. Just another reminder to always be thankful every second of everyday. The road was closed off so we had to circle around. This additional time was good because we called in our family favorite pizza, The Founders Favorite, from Donatos and had 20 minutes to kill before we could pick it up. Wonder what’s on the Founder’s Favorite? Ham, sausage, pepperoni and green peppers! Super delicious!

GEDSC DIGITAL CAMERA

The first thing we had to do was fill up the Polar Express. Gas was $3.27 a gallon. Not too bad although I do remember when gas was .99 cents when I had my very first car. Of course, that was 23 years ago, lol. Steve picked up our sodas while paying for the gas.

GEDSC DIGITAL CAMERA

Big Steve is always so thoughtful and thinking one step ahead of everyone else. While the gas was pumping, Steve cleaned off the windows of our Polar Express so everyone would have a clear view of the Christmas lights to come.

GEDSC DIGITAL CAMERAGEDSC DIGITAL CAMERA

We left the gas station and picked up our pizza. We all enjoyed our pizza as we headed first toward the Port Columbus Airport. What is really fantastic is that we received coupons for buy one ticket, get one ticket for the Zoo lights attached to the pizza box! So maybe in the near future we can do that as well!

GEDSC DIGITAL CAMERA

We found a little parking lot just off the runway and watched a couple of airplanes fly in. It was dark but the planes were lit up! Spencer really enjoyed that. Did you know there is a big “X” that flashes down the runway? I never noticed that before. Spencer was quick to see it and point it out. I guess for the pilots it means, “X hits the spot” or maybe “X this lane closed for Santa?” LOL

GEDSC DIGITAL CAMERA

Off we went down Broad Street heading west into downtown. We took side trips down well-lit streets in Bexley. Some folks go all out decorating their homes with Christmas lights (others do not, lol). Spencer loved it all and would yell out what color the lights were. Can you tell we were driving in the pictures below? LOL

GEDSC DIGITAL CAMERAGEDSC DIGITAL CAMERAGEDSC DIGITAL CAMERA

We finally arrived downtown and I was saddened for a moment to see the manger scene again not put up on East Broad. That’s ok because a couple blocks later and we were by the Columbus Commons. Downtown was busy and full of bundled up families taking in the sights, sounds and tastes of downtown! They had kiddie rides, food vendors and even a campfire to roast marshmallows. This is definitely someplace I want to come to next year with the family when the holiday season rolls around!

GEDSC DIGITAL CAMERA

We then drove further to the Scioto Mile and the lighting was so very impressive. We drove over the newly opened bridges and once we were on the other side of the river, we all got out to take in the lights and get some pictures of our beautiful downtown Columbus. The colorful lights reflected off the river creating a very magical view of the riverfront!

GEDSC DIGITAL CAMERA

GEDSC DIGITAL CAMERA

GEDSC DIGITAL CAMERA

GEDSC DIGITAL CAMERA

GEDSC DIGITAL CAMERA

GEDSC DIGITAL CAMERA

Even though we were in our PJs, we also took keepsake pictures of ourselves.

GEDSC DIGITAL CAMERAGEDSC DIGITAL CAMERAGEDSC DIGITAL CAMERA

As we drove away, I had to get a picture of the LeVeque Tower downtown. The colors are always changing depending on what month it is. The traditional red, green and white lit up the top of the building for December. It is my secret wish that one day, the LeVeque will be lit purple in the month of November to raise awareness about Pulmonary Hypertension. Maybe one day.

GEDSC DIGITAL CAMERA

We drove into German Village just south of downtown to look at more lights the residents had put up. We eventually weaved down to 104 and headed back home.

GEDSC DIGITAL CAMERA

Once home, we gasped and said, “Look Spencer! Santa had called and said he was bringing you a few presents to get you started and he must have come by while we were gone!” We told Spencer that tonight he can open one present. He looked them over and picked one. I think Santa knocked some pine needles off of the tree? LOL

GEDSC DIGITAL CAMERAGEDSC DIGITAL CAMERA

He eagerly unwrapped it and was smiling ear to ear to find it was a book. Spencer crawled up on my lap and we read the book together. I explained to Spencer there are enough presents under the tree for him to unwrap just one every night. So every night, Spencer and I will be reading a new book together! Thanks again to Beth who made this possible!

GEDSC DIGITAL CAMERA

Make your holidays bright whichever way you financially can. Anything is possible if you just BELIEVE and get a little creative!

GEDSC DIGITAL CAMERA

Ramen Noodles Made Easier for Toddlers

GEDSC DIGITAL CAMERA

I think all of us mommas know what Ramen noodles are! If you don’t, what is wrong with you?! It is a staple in our house. In fact, it was a staple when I was growing up and when Steve was growing up. When you think about it, it’s right up there with Post-It Notes. One of those things created that everyone uses but probably never stepped back to marvel at the simplicity of it all. It has to be a bultigazillion business! Now that I think about it, can you buy stock in Ramen noodles? Imagine the long-term, consistent revenue that would generate? Seriously, how many more things on this Earth could you buy  6 of them for approximately $1? It is a meal roughly costing a little more than .16 cents! This carbohydrate, sodium packed meal is yummy! Sure it’s a lot of carbs and salt but everything is always ok in moderation! Today’s post is about all the tricks Steve and I have learned over years of preparing and consuming Ramen noodles that makes the experience so much easier! Specifically, this post shows how to make the Ramen noodles toddler ready to eat in 30 seconds after boiling the noodles.

GEDSC DIGITAL CAMERA

Sure you could read the package directions and follow them, but why make it so easy? Also, it still wouldn’t be toddler-ready this way! First off, while the Ramen noodle package is intact, break the dried noodle bar in half. Then turn the package to the side and break it in half the other way creating 4 smaller noodle parts. Open up the package and remove the foil seasoning packet.

GEDSC DIGITAL CAMERA

Fill a small saucepan with water. How much? Just fill the dang thing up with enough water that when you drop the noodles in that that the water will cover the noodles up. Set that burner to high and get that water to a rapid boil. Drop in the 4 broken chunks of noodles once the water is rapidly boiling. I will say this, the package is right. It does take exactly 3 minutes to cook the noodles. Take a fork and give your noodles a quick stir. Set your timer to 3 minutes and walk away. I am usually getting the bowl out and filling his sippy cup up with milk during this time.

GEDSC DIGITAL CAMERA

Once the timer goes off, it is time to shock the noodles to stop the cooking process. Nothing is worse than over-cooked, soggy Ramen noodles! Drain off most of the water over the sink. Don’t go get a strainer out creating more dishes! Just tip the saucepan to the side and slowly pour off the boiling water.

GEDSC DIGITAL CAMERA

Now this is where we stop the cooking and cool down the noodles at the same time. Add cold water directly into the pot over the hot noodles. Fill it up and then tip the saucepan to the side again to drain out the majority of the water. I’m talking leave maybe a teaspoon or two of water in the saucepan.

GEDSC DIGITAL CAMERA

Dump the noodles (and the very small amount of water) into a kid friendly bowl. Breaking the noodles into 4 sections at the beginning helped to make the noodles a more tolerable length to eat. But with kiddos, you have to take it a little further. Take a butter knife and put it against the side of the bowl. Straddle a fork over the knife, pull back the knife and slice up the noodles. Do this as often as needed to obtain the appropriate noodle length you want. When Spencer was younger and first eating Ramen noodles, I sliced them up pretty small because it was easier for him to eat Ramen noodles with a spoon. Now that he is older, half the fun is sucking up a noodle so I give it a little length.

GEDSC DIGITAL CAMERA

Now let’s flavor up them noodles! Open up the seasoning packet and dump it over the noodles. Using the same fork you have been using, mix the dry seasoning into the noodles. Now the noodles are flavor packed versus the water it used to sit in! Most importantly, I don’t have to worry about all this broth that our Spencer most assuredly would have dumped all over himself and the table. It’s genius really!

GEDSC DIGITAL CAMERA

Because you rinsed the noodles off in cold water and dumped the majority of liquid out, the bowl of noodles is ready to eat right NOW! There’s no waiting for the noodles to cool down. No adding an ice cube to the bowl (this is how I used to rapidly cool my noodles down before I met Steve). The noodles are toddler-perfect! Hand over the bowl and the same fork to the kiddo and pat yourself on the back. Your child’s lunch is served!

GEDSC DIGITAL CAMERA

Spencer is able to eat right now! No long drawn out waiting time that often results in a lot of whining on Spencer’s part and a big headache for momma! The best part? I have one saucepan, one bowl, one butter knife and one fork to wash. Shahbang! Easy, peasy clean up! As an adult, I leave more water in the bowl and don’t slice up the noodles; I like having warm broth and like my noodles long. But for our 3-year-old, Spencer, this is the perfect way to make Ramen noodles fast and kid-friendly!

Glow Bath

Our precious baby boy had a major booboo occur almost 2 weeks ago. Long story short, he burnt his hand on the stove. I know, you are saying, “How could that happen?” or “How could the parents let that happen?” Trust me, I’ve been torn up about since it happened. It happened so fast and both Steve and I were literally right next to him when it happened. We still beat ourselves up that we didn’t react quick enough to prevent any of this. He has had his hand bandaged however the burn clinic wanted his bandage removed so that he could get his hand in soapy bath water. The occupational therapist wants him using his hand as soon as possible. So to encourage him to open his hand and play a little, we gave him a special Glow Bath! We bought some glow sticks from the dollar store and tossed them into his bubble bath. We turned the bathroom lights off and the party was on! It took him a few minutes but he finally got his hand in the water and started playing! He loves his glow baths and we try to treat him to it at least once a month. Tonight though, it was extra glow-y! We doubled our normal amount of glow sticks and let him play till the bubbles were gone and the water was cold! Spencer absolutely loves his special glow baths! If you’ve got a toddler around, give him or her a glow bath and become witness to all the fun!

Halloween Costumes

Trick-or-treating is a huge event for American kids! It is always fun for them and the parents when you find or make the perfect costume! Just wanted to share in today’s blog post the costumes of years past that Spencer and Steve Jr. had worn. Where did I find Spencer’s Dumbo and the Red Devil, well, a second-hand store of course. Around our parts we have Once Upon A Child were you can find gently used name-brand clothing, toys, furniture and other items for a discounted price. The Dumbo was a Disney original costume and let me tell you, it was just too cute to pass up! The tail on the devil outfit made it impossible for me to pass up too! Seemed appropriate for Steve Jr. to go as the Grim Reaper when his brother was the devil, lol. Although, I really doubt the Grim Reaper wears Under Armour football gloves (or maybe they are his baseball gloves?) lol!

The fireman outfit was created thanks in part to the Madison Township Fire Department. They had a booth that year at the Canal Winchester Ribs Festival and was giving out fireman hats or badges. Only one per child. Since our parents had a concession trailer at the event, we visited the booth two days in a row to get the hat one day and the badge the next. We bought a navy blue sweatshirt and navy blue sweatpants at Walmart for less than $4 each. Found the red suspenders on eBay for only $2.00 to complete the outfit. A little smeared black face paint on his forehead, cheeks and nose created the ashy look. Hmmm…it seems like I’ve cheated Spencer some with pre-made costumes. Watch out though, this year I am making him an Oompa Loompa outfit from scratch, lol. I don’t think I spelled Oompa Loompa correctly? Oh well! I’ll be sure to post a pic once I have it all done!

Our oldest son, Steve Jr., had some memorable costumes as well. He was a clown in preschool. His MawMaw Lockwood had sewn the costume and when we found the wild colored wig, it was a perfect mix!

My favorite though by far is the tin man from the Wizard of Oz! We took one inch foam and cut it to make a cylinder with arm holes. We used spray adhesive to glue metallic silver fabric to it. I then added a collar of sorts that had a pull tie. I made arms and legs by sewing the fabric into cylinders. I then hand basted them to gray sweats. I found the same metallic fabric in shoe covers that slid right over his tennis shoes. We bought a cheapo plastic funnel and punched holes in for the chin ties. We then spray painted primer followed by metallic silver paint onto the funnel. We used metallic silver face paint to add color to his chunky little cheeks and sweet little nose. I added sequins strands to his outfit for just a little more bling! Just like the tin man, Steve Jr., has always had a big heart! I also made his cousin’s Dorothy outfit. I had the dress in mind and just winged it! I made the skirt extra fluffy adding layers of tulle. She just wore a white sweatshirt for the shirt and we lucked into red glitter slippers. I did a double French braid and put pretty bows in her hair. Her costume turned out perfect! When Dorothy and the Tin Man went trick-or-treating, the folks in the neighborhood just loved their costumes!

He also went as a doctor one year. I ordered children’s size scrubs from a uniform catalog and even had “Dr. Pack” embroidered onto it. This was an especially awesome costume because ever since our son was five-years-old, he has wanted to be a doctor! He has not entertained any other life goal and continues his plans of becoming a physician. When he talks about his future, he always says, “when I am a doctor…”. There is no doubt in our minds he will become one and an amazing one at that. Another favorite costume we had made for Steve Jr. was the robot. For the robot, we took two boxes (one large enough for his torso to fit in and one that fit perfectly over his head). We cut out the sides and front of the head box and put screen mesh in there (so he was able to see in front of him and out the sides). We also cut a large round hole out of the bottom of the head box so that his head would slip in. We cut the bottom out of the torso box and armholes. We then cut a hole big enough for his head to fit through. The torso box was held up by his shoulders. We taped the boxes together and spray painted the whole thing metallic silver. We added a bunch of different knobs to the front (just used various items found around the house) and hand-painted little sayings above each. We added an antenna on top. To complete the outfit, Steve punched out tiny holes and we added a battery operated string of lights to his boxes! It was cute! Not sure why we didn’t get a picture of the robot and doctor?! Dang us! LOL! The robot was a huge hit and he wore his costume for a party at his elementary school. He came home missing some knobs because the kiddos couldn’t keep their hands off of his super cool costume, lol! We have saved every costume our children has worn. I just can’t let go of things that make my heart melt and things that make me smile. Hopefully some of these costumes inspired you to create something unique for your kiddos! They are only children for a short period of time, make everyday memorable!

Make this Halloween unforgettable!

Bag of Bones Halloween Treats

Fall is seriously just around the corner! I can feel the cool air coming and can’t wait for the change of season! To get you excited too I am adding a recipe to make a Bag of Bones! Super easy and super cute!

Ingredients:

  • White Candy Melts

  • White Mini Marshmallows

  • Thin Pretzel Sticks

  • *Shortening

Directions:

Place a large sheet of wax paper down. Press one mini marshmallow into each end of the thin pretzel stick. Repeat until approximately 50 are made. Melt the white candy melts whichever way you normally melt chocolate (double boiler, chocolate melter crockpot or microwave). I find that white candy melts often don’t melt into a smooth puddle of chocolate. I often will add a teaspoon of shortening to the contents of an entire bag of candy melts to help smooth it out (add to candy melts as you are melting them). Dip the entire pretzel stick with marshmallows on each end into the melted white chocolate (I use a fork to dip it in the candy and to remove it from the candy). Shake off excess. Place on wax paper until candy hardens. They look really cute once you are all done and taste great too! Decorate a brown paper bag with a skull and write “Bag of Bones” on it. I added a red bow (just stappled it to the bag) to add a little color! Place a few “bones” into a ziploc and place it in the bag to give away as treats!

DIY Slushy Maker

Anyone who knows me knows that I am a slushy junkie! I love shaved ice so much so I think I talked my in-laws into buying an ice shaving machine for their concession trailer. I don’t think they regret it, it’s always a big hit and comes in handy for other things like Spencer’s birthday parties, their grandchildren’s graduation parties and so on. So when I saw the “magic cups” that you can buy to make slushies in the store, I was eyeing it something fierce. The all too frugal hubby gave me the “no” nod but I secretly knew I would buy it later when I wasn’t with him, muhahahahaha (that is my evil laugh by the way)!

So I was trolling Pinterest like I always do way too much and came across this pin. This momma figured out how those “magic cups” work! So of course Spencer and I had to find out if home-made slushies were just a good shake away!

First, we filled a quart-size Ziploc bag just over half full of water.

With Spencer’s help, I added salt, lots of salt. How much salt? Enough that it was seriously cloudy water, lol. Doesn’t matter if you add too much salt, it will just settle at the bottom of the bag if the water is over-satured and unable to dissolve any more water.

Then I sealed the bag and told Spencer to give it a good shake.

And shake he did, lol. To ensure it was shook up enough, I gave it a couple shakes too only to find that our bag had a leak near the zipper part, bummer! No worries, I will just dump it into another ziploc bag. Seemed like a logical idea until I attempted to do it myself. Turns out it is a two-person job. One to hold the new bag open and one to dump the old bag into the new bag. I ended up dropping the new bag and spilling about 1/2 of the salt water all over the counter, between the stove and counter, onto the stove, down the front of the stove and all over the floor! Dagnabit! You wouldn’t believe how much water 1/4 of a quart is. It is tons of water! You know when you are at the beach and you get out of the water and sun dry? You know that sticky saltiness residue that remains on your skin? Yeah, that’s what was all over my counter, stove and floor! Yay me!  So after my 15 minute clean up, I added more water to the new bag and more salt.

I was smart this time! Burn me once it’s the bag’s fault. Burn me twice then it’s my dumb fault, lol. I double-bagged my salt-water! Be sure to let out as much air as you can out of the first bag and out of the 2nd bag. Lay it flat in the freezer and come back to it in 24 hours.

So way past 24 hours, I took the salt water out of the freezer. I totally forgot about this, it probably was in there a couple of weeks! So does it really only take 24 hours to freeze? I don’t know, lol! I had a frozen chunk of salt water after a couple of weeks, lol. Ok, turns out ours wasn’t fully frozen . . . maybe I added way too much salt? It was almost frozen through, just a little free standing salt water (maybe a tablespoon worth).

Put your quart bag of frozen salt water into a gallon ziploc. Pour any drink (I’m not sure about carbonated drinks) into the gallon ziploc (Spencer helped with this)!

Yes, that is a sock on the kiddo’s hand. It is covering a bandage. Spencer had a booboo the other day.

Give it a good shake, many, many, many, many good shakes. Tadah! You will end up with a slushy! Pour the slush into a cup and enjoy. Rinse the liquid off your salt water ziploc, dry it off and put it back in the freezer to make another slushy some other day!