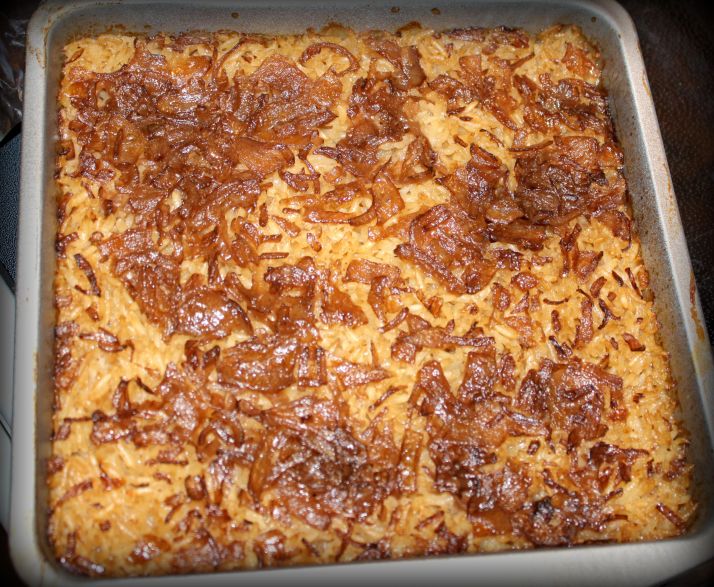
Butter Rice

craftycreativekathy.wordpress.com

I am half Filipina. This means I’ve ate more than my fair share of rice. When I was growing up, we had rice for every meal in every possible way. We had steamed rice, fried rice, rice cakes, chocolate rice, Spanish rice, you name it. I had it with breakfast, lunch and dinner. And sometimes, it was dessert (hence the chocolate rice). When I hit my 20s, I was just sick of rice. I boycotted it for almost 10 years. You have to understand that my mother always had rice in the rice cooker every minute of every single day. When we would visit my mom, our oldest son always tore up her steamed rice. I felt bad because I was basically keeping rice out of my son’s diet, lol. I’ve slowly gone back to making rice more often. Whipping up fried rice every couple of weeks keeps the kiddos happy. I am partial to plain ol’ steamed rice. Sometimes I don’t even add soy sauce. Every once in a while though, I get a craving for flavored rice. This butter rice really transforms rice into an exquisite side dish. It is hearty and packed full of flavor!

Printable Recipe: Butter Rice

craftycreativekathy.wordpress.com

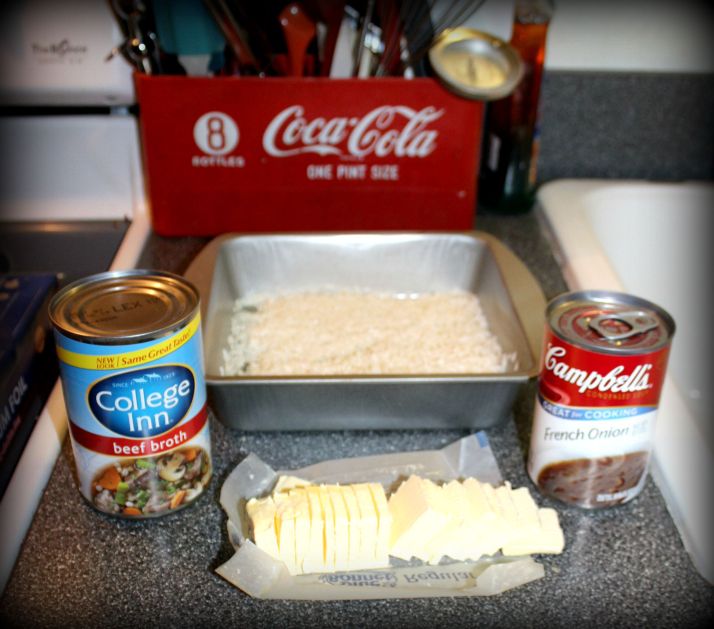
Ingredients:

  • 1 cup uncooked white rice (do not use instant rice)

  • Soy sauce (in a spray bottle)

  • 10 oz can of French onion soup

  • 10 oz can beef broth

  • 1 stick of butter or margarine

Directions:

Preheat oven to 425 degrees.

craftycreativekathy.wordpress.com

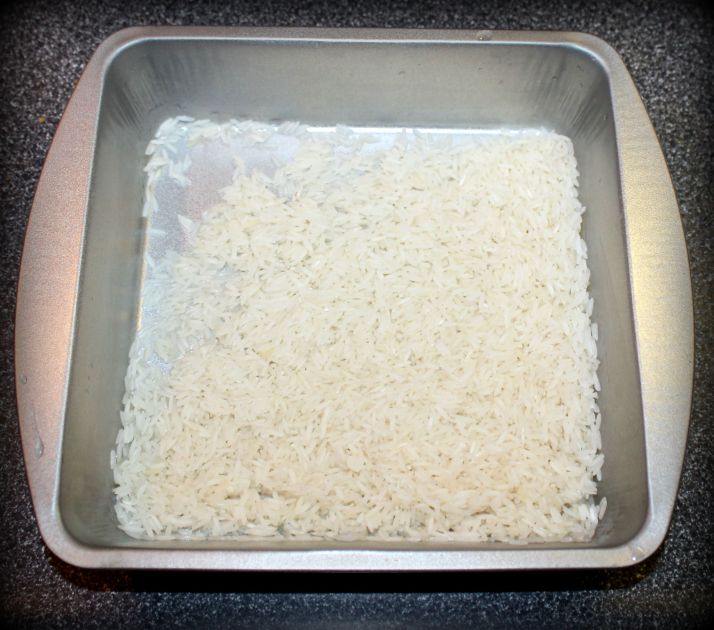
Add rice to a 9×9 square baking pan.

craftycreativekathy.wordpress.com

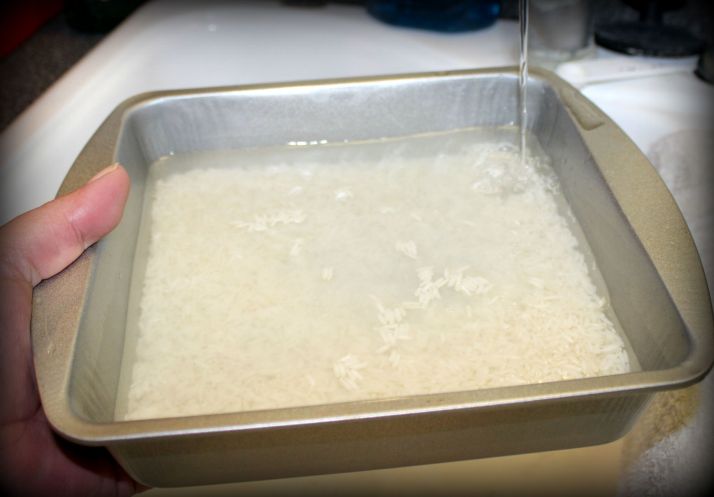
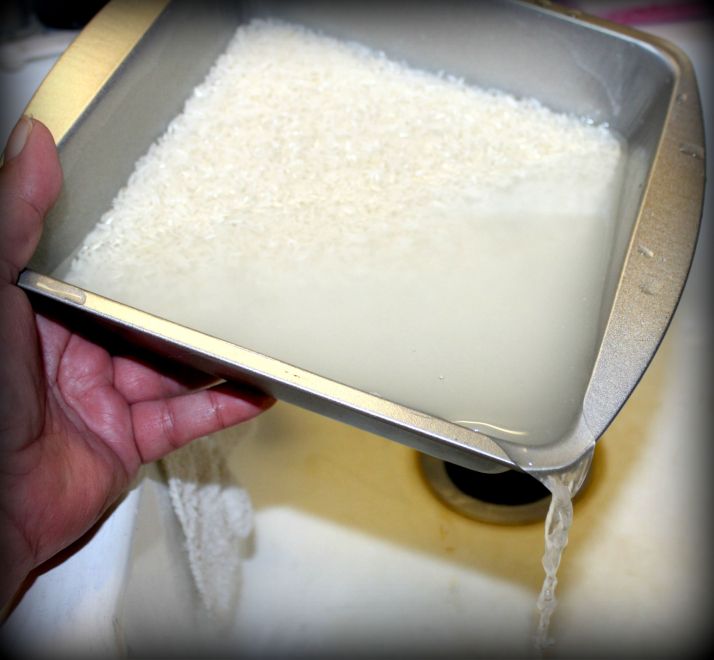
Add water. Rinse dust and particles from rice by carefully dumping the water out.

craftycreativekathy.wordpress.com

Repeat as many times as necessary. Pour out as much of the water as possible.

craftycreativekathy.wordpress.com

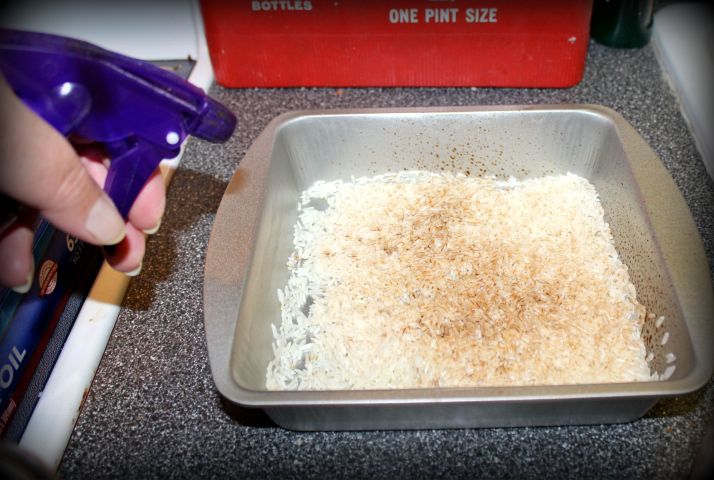
Spray a light layer of soy sauce onto rice.

craftycreativekathy.wordpress.com

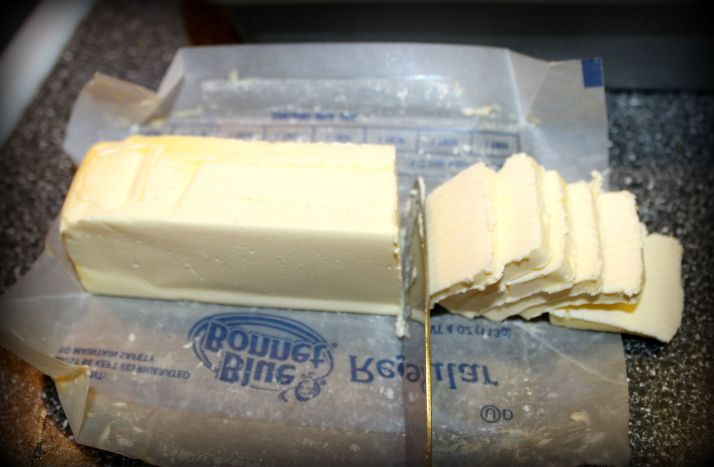
Slice butter or margarine into little pats.

craftycreativekathy.wordpress.com

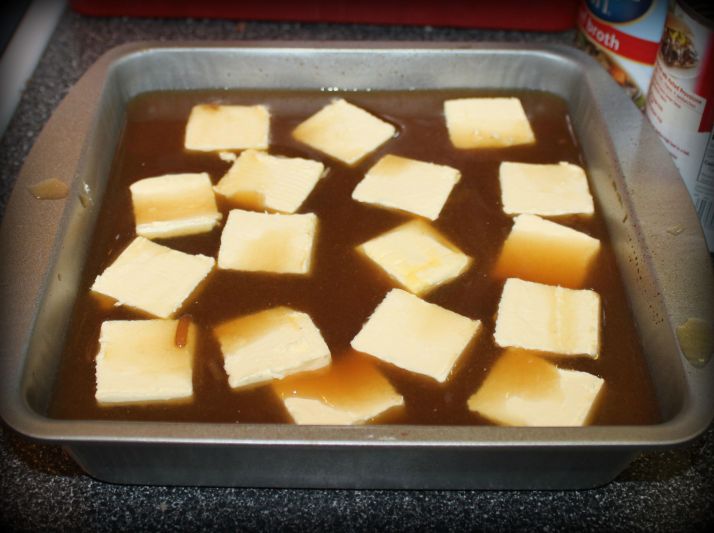
Add French onion soup and beef broth. Place butter or margarine pats in pan (they will float on top of the liquid). If you aren’t too keen on that many onions, you can add all the liquid from the French onion soup and then spoon out the amount of onions you want into your pan. The onions get fully cooked down and are very soft.

craftycreativekathy.wordpress.com

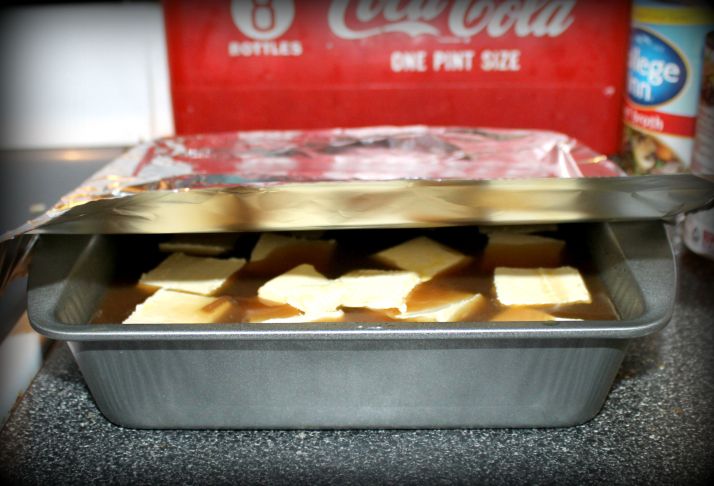
Cover with foil and bake for 30 minutes. Remove cover and bake for 30 more minutes.

craftycreativekathy.wordpress.com

Stir and serve.

Buffalo Chicken Dip

craftycreativekathy.wordpress.com

Buffalo Chicken Dip is a very popular dip to bring to a party. There are very few people who don’t love chicken wings and this dip mimics that taste so well! The added plus is that you can have all the flavor of chicken wings without the bones! Which for me is a super plus plus because as you all know, I don’t do bones, lol! This whips together quickly with very few ingredients. If you are one of the maybe 5 people on Earth who have not tried this, give this recipe a whirl, you won’t regret it!

Printable Recipe: Buffalo Chicken Dip

Ingredients:

  • 8 oz cream cheese, softened

  • 2 – 10 oz cans cooked chicken, drained

  • 1/2 to 3/4 cup Frank’s Red Hot Sauce (depending on how hot you want it)

  • 1 cup ranch dressing

  • 2 cups shredded Monterey Jack Cheese

Directions:

Preheat oven to 350 degrees.

craftycreativekathy.wordpress.com

In a large bowl combine first 4 ingredients with a hand mixer on medium speed till well combined. Fold in 1 cup of shredded Monterey Jack Cheese.

craftycreativekathy.wordpress.com

Place chicken mix in a glass 9×13 casserole dish. Evenly sprinkle 1 cup of Monterey Jack cheese on top.

craftycreativekathy.wordpress.com

Bake 30-40 minutes until bubbly. Allow to cool for approximately 10 minutes before serving with tortilla chips.


Red, White & Blue Strawberries

GEDSC DIGITAL CAMERA

Having been born in the Philippines to my Navy father and Filipina mother, I have patriotic blood running deep within. I’ve lived in the Philippines and Japan. Been to Canada and Mexico. When you step off American soil onto foreign land, it is in that moment that you recognize and appreciate what it means to be American. The government of the United States is the result of a revolution in thought. It was founded on the principle that all persons have equal rights, and that government is responsible to, and derives its powers from, a free people. These rights are guaranteed no matter your race, your gender, your religion, your sexual preference, your socioeconomic class or any other psycho-social classification. The right to be educated, more specifically the right to be an educated woman, is the right I cherish the most.

We are in the middle of the long holiday weekend. It is Memorial Day weekend. A time to remember and give thanks to those who guaranteed our American rights. The soldiers in all of our branches along with first responders serving at the local level, the firefighters, EMTs and police officers serve to protect our freedom. Freedom isn’t free. It has been paid for with blood. Let us all remember why we are gathering with family and friends for cookouts over this weekend…this holiday reminds all of us how blessed we are to live and be a part of the great

UNITED STATES OF AMERICA!

IMG_8000

We will be bringing to a cookout some patriotic red, white and blue strawberries! Really easy to make! Rinse and dry off ripe, fresh strawberries. I chose to use short shish kebab sticks and pierced the strawberries through the stem (but not all the way through the tip of the strawberry). You can omit this and just hold the strawberry leaves when dipping. Place blue sanding sugars in a small bowl. Melt down white candy coating (found around chocolate chips used for baking) in a small but deep enough dish that allows you to dip the strawberries 2/3 up to the stem in white candy. Gently shake off the excess. Gently dip the coated strawberry 1/3 the way up in blue sanding sugars. See the photos for how much white candy melt and blue sanding sugar to use. If using shish kebab sticks, place sticks in a styrofoam block until the white candy melt sets. If not using shish kebab sticks, gently lay the dipped strawberry onto wax paper until the white candy melt sets.

IMG_8014

We are also taking one of our favorite desserts with us, our Strawberry Pretzel Dessert! Yum, yum, yum! Be safe friends and family and give thanks to those who deserve our respect this memorial weekend!

GEDSC DIGITAL CAMERA

Happy Mother’s Day

Looking for a unique, inexpensive and super thoughtful Mother’s Day gift? Look no further! Make her therMOMeters! 

craftycreativekathy.wordpress.com

They are pretzel rods dipped in white candy melt with a drizzled red line and drizzled black hash marks. They were so easy to make! Literally took a total of an hour to make over 60 of these! The hardest part was finding 60 intact pretzel rods! I used 3 squeeze bottles (like for ketchup and mustard) to make these. I filled one bottle with the white candy melt discs. Popped the plastic bottle in the microwave for 60 seconds. Then I squeezed the bottle and put it back in for 25 seconds. Although I filled the bottle to the top with the candy melts, once they melted down, it was about 1/2 full. I just put more candy melts inside and gave it another two times in the microwave at 25-30 second increments squeezing the bottle between cycles. Make sure the white candy melt goes all the way to the top! Do not put on the lid. Lay out wax paper. Dip the pretzel rods straight down into the bottle. Gently swirl the rod in a circular motion over the bottle opening to allow the excess candy melt to drip back down. Lay flat on the wax paper. Repeat until all rods are dipped. I had to refill the plastic squeeze bottle one time with candy melt discs and put it back in the microwave. Toward the end, I would dip the rod and gently squeeze the bottle (don’t squeeze so tight that you are touching the rod inside) and the candy melt would come up the rod and cover it. Repeat the same steps in melting the red and black candy melts in their own bottles. Squeeze a dollop of red (to create the bulb) and pull down the length of the white. Repeat until all rods have red bulb/lines (be sure the white is fully set before squeezing on the red). Once the red is fully set, squeeze black hash marks in even increments up the rod). These were so easy to make and so cute. 

craftycreativekathy.wordpress.com

Here’s the tag above that you can download and paste into a Word document. Just right click over the picture and choose something like “save as” and save it to your computer. Tie the tag with a ribbon around the rim of the mason jar for the cutest Mother’s Day gift ever!

LPN Graduation Party

craftycreativekathy.wordpress.comI am so proud of my husband! He stuck it out and saw it through! Going back to college in  your 40’s is no walk in the part but he was determined to show our children it is never too late to dream and never too late to learn! With the help of family and friends we threw the biggest surprise graduation party I’ve ever been to! There were around 90 family and friends there to celebrate with us! In 19 years together, I’ve never been able to surprise the hubby. He always figures it out if I’m up to something and often can guess exactly what it is I bought him for his birthday or Christmas…it’s quite annoying! But no more! I got him good and he was so humbled by the show of support and love! Just wanted to share a couple of goodies I had made for his party and also what went into his Thank You baggies!

craftycreativekathy.wordpress.com

First I have to throw up a picture of the 3 loves of my life! When you graduate from nursing school, it is all about the pinning ceremony. It is during this ceremony that someone you choose who is important to you pins you officially making you a nurse. Steve from the beginning wanted our sons to pin him! It brought tears to my eyes seeing my 2 1/2 men on stage! A very proud Pack moment for sure!

craftycreativekathy.wordpress.com

No grad party (or any party I have anything to do with, lol) is complete without cake pops! I found these awesome Wilton mini cupcake liners that went perfect with my famous dip and drop cake pops. I made the personalized flags to complete the cake pops!

craftycreativekathy.wordpress.com

I had to come up with some centerpieces for the large picnic tables. I try to always make something functional and making the centerpieces edible did the trick! I made thermometer rods! They are pretzel rods dipped in white candy melt with a drizzled red line and drizzled black hash marks. They were so easy to make! Literally took a total of an hour to make over 60 of these! The hardest part was finding 60 intact pretzel rods! I used 3 squeeze bottles (like for ketchup and mustard) to make these. I filled one bottle with the white candy melt discs. Popped the plastic bottle in the microwave for 60 seconds. Then I squeezed the bottle and put it back in for 25 seconds. Although I filled the bottle to the top with the candy melts, once they melted down, it was about 1/2 full. I just put more candy melts inside and gave it another two times in the microwave at 25-30 second increments squeezing the bottle between cycles. Make sure the white candy melt goes all the way to the top! Do not put on the lid. Lay out wax paper. Dip the pretzel rods straight down into the bottle. Gently swirl the rod in a circular motion over the bottle opening to allow the excess candy melt to drip back down. Lay flat on the wax paper. Repeat until all rods are dipped. I had to refill the plastic squeeze bottle one time with candy melt discs and put it back in the microwave. Toward the end, I would dip the rod and gently squeeze the bottle (don’t squeeze so tight that you are touching the rod inside) and the candy melt would come up the rod and cover it. Repeat the same steps in melting the red and black candy melts in their own bottles. Squeeze a dollop of red (to create the bulb) and pull down the length of the white. Repeat until all rods have red bulb/lines (be sure the white is fully set before squeezing on the red). Once the red is fully set, squeeze black hash marks in even increments up the rod). These were so easy to make and so cute. I did wrap each one individually for the party. I used wide mouth canning jars filled lightly with foil shredded paper on the bottom. I was able to get about 5-6 in each mason jar. It was so cute and I received a lot of compliments on them. Be sure to check out my other post on how to turn these thermometers into an awesome Mother’s Day gift HERE.

craftycreativekathy.wordpress.com

craftycreativekathy.wordpress.com

craftycreativekathy.wordpress.com

craftycreativekathy.wordpress.com

Lastly, with that many people who attended his party, I knew I wanted to have the Thank You bags ready for guests as they were leaving (saving us time and money sending out Thank You cards in the mail). Also, it gave me the chance to personalize his Thank You gifts with a nurse theme! Enclosed in each bag was a tiny bottle of bubbles found at Dollar Tree (you get 6 for only $1.00). The bottles each had these cute graduation caps on top for the lids! Next there were 2 band-aids, 2 antibiotic packets and a lifesaver inside. I found these awesome thank you cards at Flower Factory. They were only $10.00 for 50 of the cards with envelopes! The inside was blank. I made a tag using Word. If you read the card, the Lifesaver candy really completed the bags! With fancy scissors the tags were cut out and taped down using double-sided tape. I also had a small wallet-size photo of Steve in his scrubs. The red bags themselves were purchased at Flower Factory and were around $3.00 for 12. A total of 48 bags were made and laid out on the end of the gift/card table. The Thank You bags were perfect! Big props going out to Rhonda who was the one who actually put the bags together for me! I couldn’t have done this surprise graduation party without the help of family and friends! Thanks to Beth, Rhonda, Lamira, Tami and Steve’s parents, Ingrid and Chuck, who provided all the food! Grilled Italian chicken breasts, boneless marinated pork, hotdogs and several different salads! What a wonderful memory we will always have!

599489_580456738639146_1452025432_n

Congrats Steve, we are really proud of you!

Blessings

craftycreativekathy.wordpress.com

I had a very ulterior motive when I started this blog full of crafts and recipes. With every recipe, I post the directions along with several photos. I am PHighting pulmonary hypertension. It is a battle I will lose one day. Before that happens, I want my children to have our family recipes.

Pumpkin Cake with Apple Cider Glaze – craftycreativekathy.wordpress.com

I want to create a photo book that is a Pack Family Cookbook full of the recipes we love and pictures of each step of the directions. Keeping the recipes all on my blog will make it easy for me to copy the recipes and photos over to a photo book. I plan on putting photos of our family throughout our personal cookbook. I will then make two copies, one for each of our sons. When pulmonary hypertension wins, the kids will have something that will always remind them of their mommy. That was always the plan. One day when they are adults, they can tell their kids that what they are eating for dinner was Grandma’s recipe.

craftycreativekathy.wordpress.com

In the process of maintaining my blog, I felt compelled to share our story, our PHight with pulmonary hypertension. The problem with pulmonary hypertension is that it is a rare disease. Not many people know what it is. I am a nurse and didn’t know what pulmonary hypertension was. We all know what hypertension is. Regular (peripheral) hypertension is a common diagnosis. When you put “pulmonary” in front of it though, it turns into a nightmare. I bared all HERE about our PHight because awareness is the key…it is the answer. If awareness increases then funding increases. If the funding increases then the research increases. If the research increases then the treatment options increase. Eventually, we will have a cure for this dreaded disease but it starts with just raising awareness.

craftycreativekathy.wordpress.com

My blog is just a tiny part of the enormous World Wide Web. I’m in awe when folks stumble onto my website. I don’t advertise. I don’t have sponsors. I am touched when someone finds my blog and takes the time to read about our PHight. I am humbled when they take the time to leave an uplifting comment. And today, I am speechless because someone who stumbled on my blog, took the time to read our story, found it in their heart to comment, went farther than I have ever imagined.

craftycreativekathy.wordpress.com

Ms. Laura Young made a tribute donation in honor of myself to the Pulmonary Hypertension Association. This has never happened to me before. I have not ever met Ms. Laura Young. Our interaction was brief: she left a very kind comment and I responded with an appreciative comment. Yet this one person took the time to make a donation to the very organization that is funding some cutting-edge research on pulmonary hypertension. My goal with sharing our story was to raise awareness…never did I think it would lead to a donation.

craftycreativekathy.wordpress.com

Thank you Ms. Laura Young. You’ve touched my heart. The world is full of amazing people and I’m thankful that one of those amazing people stumbled onto my little ol’ blog. Ms. Laura, you have made my day, my month, my year, and my life with your thoughtful gesture.

May God bless you always.
Bouquet of Beer

IMG_6344

We celebrated our Papa Jerry’s birthday today! Although Jerry is not my biological father, he has never treated me any less than his own biological daughter. I love Jerry for being the father I didn’t know I needed. My children love him and only know him to be Papa. Papa doesn’t like a lot of fancy things so we wanted to get him something we knew he would use. Who doesn’t like a 6 pack of beer every once in a while? Well, to turn beer into a gift, you have to glam it up some! So I added foam flower petals and ta-dah…he now has a bouquet of beer! To make the petals, buy sheets of foam in the colors of your choice. Using this TEMPLATE, cut out 6 flower shapes (or however much you need). I just googled images for flower petals and found these 3 to be perfect. Ignore the designs inside the flowers, you only want to trace around the outline of the flowers onto your foam sheets. To place the flowers over the bottle caps, cut an “X” in the center of the flower that is large enough for the flower to slip over the bottle cap. Gently push the flower down and then pull back up to just under the bottle cap so that the peaks of the “X” are pointing downward and only the flower surrounds the bottle cap. With the thin long petals (the yellow ones), it is best to cut the “X” and place the petal over the bottle cap before cutting the thin petals. This is a simple gift that any man would appreciate! Just think, Father’s Day is just a couple of months away! Our Bouquet of Beer brought a smile to our Papa Jerry’s face and even a little chuckle. Happy Birthday Papa Jerry, we love you!

Pillow Sandies

Crafty Creative Kathy - Pillow Sandies

Many years ago, Steve’s great uncle came to visit from Arkansas. He said he wanted to make dessert and came back from the store with 3 ingredients: milk, pecan sandies and whip cream. What he created was heavenly to say the least. We can’t recall what he actually called his dessert and through the years, Steve and I would refer to this dessert as Pillow Sandies. Because it is literally pecan sandies layered in pillows of whip cream…and it is devilishly delicious! You really have to make this before judging. It is light and airy with a nutty, butter sensation. Yep, it’s that good.

Printable Recipe: Pillow Sandies

Crafty Creative Kathy - Pillow Sandies

Ingredients:

2 – 8oz tubs of whipped cream
1 pkg Keebler’s Pecan Sandies
Milk

Directions:

Pour milk into a short but wide cup. Make sure the milk is deep enough to dunk a whole cookie into.

Crafty Creative Kathy - Pillow Sandies

Dip one cookie at a time into the milk, dunk it all the way in and hold for 3-5 seconds. Spencer loved dipping each of the cookies. Of course I scrubbed the heck out of his hands before the dips! I loved hearing him count to 5 for each dip. You can add more milk as needed to the cup.

Crafty Creative Kathy - Pillow Sandies

Place dipped cookie in a glass round dish. Continue dipping until you have an even layer of cookies. Dollop whipped cream on top and smooth into a 1/2″ layer of whipped cream ensuring all the cookies are covered.

Crafty Creative Kathy - Pillow Sandies

Crafty Creative Kathy - Pillow Sandies

Crafty Creative Kathy - Pillow Sandies

Repeat steps 2-4 until you come down to the last 3-4 cookies.

Crafty Creative Kathy - Pillow Sandies

Crafty Creative Kathy - Pillow Sandies

Crafty Creative Kathy - Pillow Sandies

With remaining cookies, crumble them on top of the last layer of whipped cream.

Crafty Creative Kathy - Pillow Sandies

Cover and place in fridge to chill for at least 2 hours. Spoon out to serve. No it’s not the prettiest of desserts because it does have to be scooped and slopped onto a plate but the flavor really is out of this world. As far as ease, it’s the best. 3 ingredients that is dipped and dolloped into fluffy pillow layers. Yep, it’s that simple and that good!

Original Design Basketball Afghan

Finally finished this season’s basketball afghan! The afghan is raffled off by GMHS basketball parents and 100% of proceeds goes toward the basketball program to help with the end of season banquet. It is completely reversible and super thick. Finished size is approximately 46″ x 46″. This is an original crochet pattern that I designed and I am really happy how well it came together 🙂 I think I’ll call this 5 Man Basketball Block. I wanted to make sure there were 5 basketballs the size of actual basketballs to represent the 5 players on the court. This is a twist on my Grand Slam Baseball afghan pattern that incorporated granny squares. The Grand Slam Baseball afghan pattern is for sale in my Etsy shop and Ravelry shop for only $6.00. If you have that pattern, you just change the stitching of the large balls to single crochet and attach to the large circles to create the Basketball stitching. If looking for a very unique basketball pattern, check out this post on my blog and the Basketball Block pattern is also sold in my Etsy shop and Ravelry Shop for only $6.00. And I might as well throw up a link for the Touchdown Football pattern that also is on sale for $6.00 in my Etsy shop and Ravelry shop. My raffled, crocheted afghans have raised close to $1500.00 altogether for the football, basketball and baseball program. Use your God-given talents and find a way to give back. You can give more than just money (and for some, money is not an option) and nothing is more rewarding than going to a football game and seeing any of the so far 10 afghans I’ve made and donated to be raffled being used in the stands by Cruiser fans. In the end, it’s all about the kids!

Baked Parmesan Crusted Melt In Your Mouth Chicken

Steve made this the other day and it was gone in no time! Loved by both kids! The flavor explosion is unmatched and the chicken literally just melted on your tongue. Definitely don’t need a knife to cut this up! Your fork will do just fine. Super good and you need to try this! You’re welcome because you will be thanking the Packs later, lol! The pictures show a double batch being made…we just knew everyone would want 2 pieces of chicken, lol!

Printable Recipe: Baked Parmesan Crusted Melt In Your Mouth Chicken

Ingredients:

  • 4 boneless, skinless chicken breasts (the ones found frozen individually in freezer that have been thawed)

  • 1/2 cup mayonnaise

  • 1/2 cup grated, parmesan cheese

  • 1 1/2 teaspoon seasoning salt

  • 1/2 teaspoon black pepper

  • 1 teaspoon garlic powder

Directions:

Preheat oven to 375 degrees.

In a small bowl, mix together mayonnaise, parmesan cheese, seasoning salt, black pepper and minced garlic.

In a metal or glass baking dish, lay chicken pieces in one flat layer.

Dollop the mayonnaise mixture evenly on top of the chicken.

Spread the mayonnaise mix evenly across the top of the chicken breasts.

Bake for approximately 45 minutes or until chicken is cooked throughout.